


TL;DR:
- Quick install hair extensions, such as clip-in and tape-in types, offer quick, at-home application without professional tools. Proper preparation, layered installation, and careful aftercare ensure natural-looking, long-lasting results, while selecting the right method depends on your lifestyle and desired duration. Effective removal and accurate color matching are essential for maintaining hair health and achieving a seamless, natural appearance.
Quick install hair extensions are defined as wefts or hairpieces designed to be applied at home in minutes, without professional tools or salon appointments. The two most common types are clip-in extensions, which take only minutes to apply, and tape-in extensions, which offer a semi-permanent result completed in roughly 30 to 60 minutes. Both methods let you add length, volume, or colour without any long-term commitment or chemical processing. For anyone seeking an immediate hair transformation, explaining quick install extensions starts with understanding which method suits your lifestyle, your hair type, and how much time you want to invest.
What are the main types of quick install hair extensions?
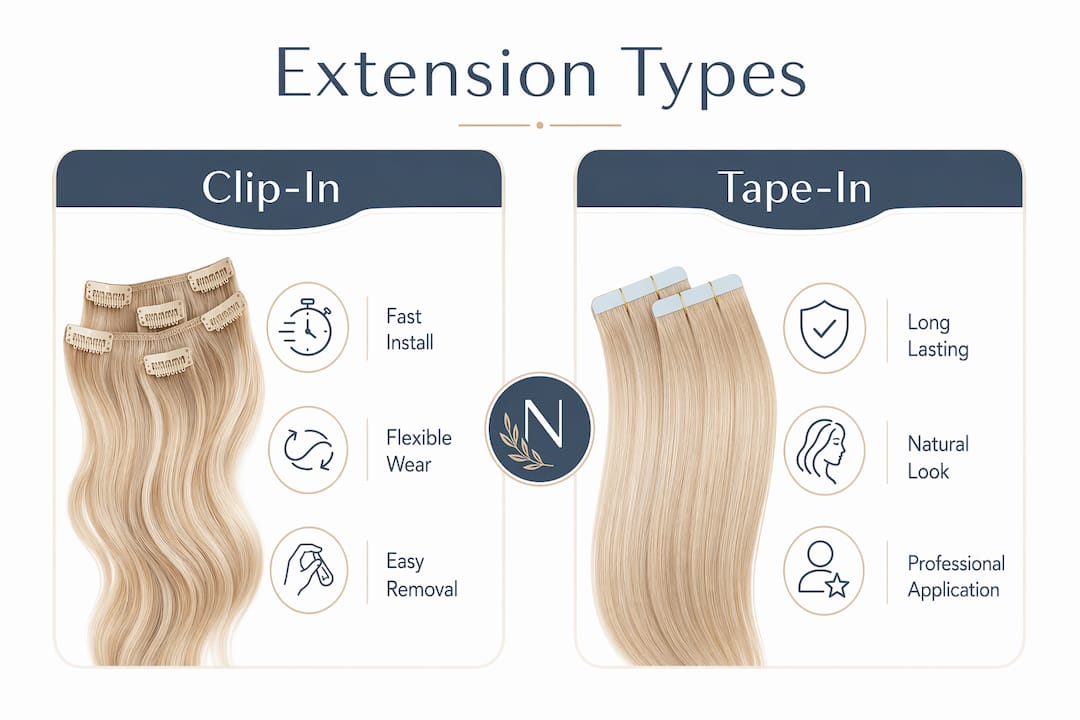
Clip-in and tape-in extensions are the two formats that genuinely qualify as quick install methods. Sew-in weaves and keratin bond extensions require professional application, heat tools, and several hours in a salon chair, which places them firmly outside the quick install category.
Clip-in extensions
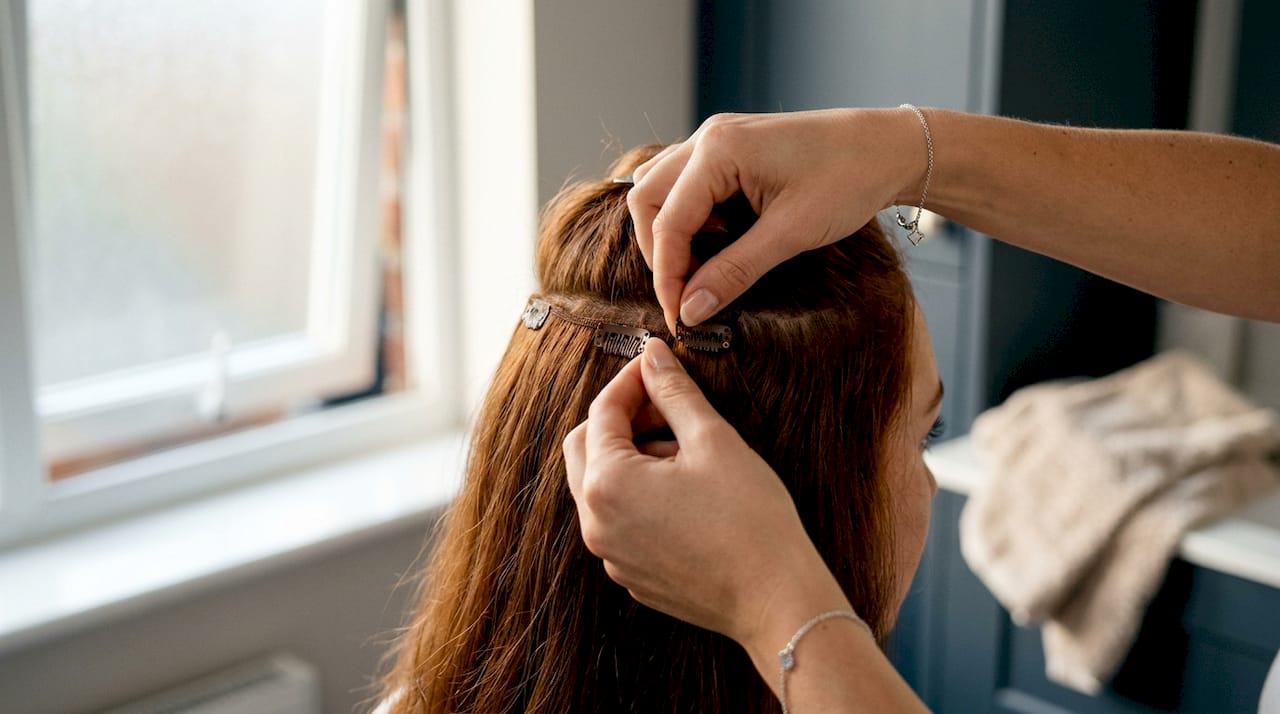
Clip-in extensions consist of wefts of hair attached to small pressure-sensitive clips. You open the clip, position the weft close to the root, and snap it shut. A full head of clip-ins can be in place in under 15 minutes once you know what you are doing. Clip-ins offer flexible wear, meaning you can remove them nightly or keep them in for a few days depending on your preference.
Tape-in extensions
Tape-in extensions use strips of hair pre-attached to medical-grade adhesive tape. The wefts are sandwiched around thin sections of your natural hair, bonding flat against the scalp. A full head of tape-ins takes approximately 30 to 60 minutes to install, making them the fastest semi-permanent option available. Tape-ins are also popular in salons because of their flat profile, speed, and the fact that they can be reused with proper care.
Clip-in vs tape-in: which is right for you?
| Feature | Clip-in extensions | Tape-in extensions |
|---|---|---|
| Installation time | Under 15 minutes | 30 to 60 minutes |
| Wear duration | Hours to a few days | 4 to 8 weeks |
| Commitment level | None, fully removable | Semi-permanent |
| Best for | Occasions, daily styling | Longer-term volume and length |
| Reusability | High with gentle care | Yes, with new tape tabs |
| Skill required | Beginner-friendly | Moderate, easier with practice |
Clip-ins suit anyone who wants flexibility and zero commitment. Tape-ins are the better choice when you want a longer-lasting result that stays put through workouts and washing.
Pro Tip: If you are new to extensions, start with clip-ins for your first few wears. You will learn where to place wefts for the most natural result before committing to a semi-permanent method.
How to prepare and install quick install extensions correctly
Good preparation is the single biggest factor in how natural and secure your extensions look. Rushing this stage is the most common reason extensions look obvious or fail early.
Steps for installing clip-in extensions
- Wash and dry your hair fully. Clean hair gives clips a firmer grip. Avoid applying any serum or oil before clipping in, as this causes slippage.
- Section your hair horizontally. Use a tail comb to create a clean parting roughly 2 to 3 centimetres above the nape of your neck. Clip the top section away.
- Tease the root slightly. A small amount of backcombing at the root gives the clip something to hold onto without damaging your hair.
- Open the clips and position the weft. Place the weft as close to the parting as possible, then snap each clip shut from the centre outward.
- Release the next section and repeat. Work upward in layers, placing wider wefts towards the middle of the head and smaller wefts near the temples.
- Blend and style. Once all wefts are in, let your natural hair fall over them. Use a wide-tooth brush to blend, then style as normal.
Steps for installing tape-in extensions
- Clarify your hair the day before. Clean, product-free hair is non-negotiable for tape-in adhesive to bond correctly. Use a clarifying shampoo and skip conditioner near the roots.
- Dry your hair completely. Any moisture near the bonds weakens the adhesive from day one.
- Section the hair into thin panels. Each panel should be no thicker than the tape tab itself, roughly 0.5 centimetres.
- Apply the sandwich method. Place one tape weft beneath the panel, adhesive side up. Lay the hair flat on top, then press a second tape weft on top with adhesive facing down. Press firmly for 5 to 10 seconds.
- Work upward in rows. Leave at least 1 centimetre of space between the bond and the scalp to allow natural movement.
- Avoid heat near fresh bonds for 24 hours. The adhesive needs time to fully cure before you apply any styling tools.
Pro Tip: For tape-ins, use sectioning clips to keep unworked hair out of the way. Rushing the sectioning stage leads to uneven placement, which shows through the hair once it is down.
Common mistakes to avoid include placing wefts too high near the hairline, overlapping tape tabs, and using dry shampoo or volumising spray near the bonds. Each of these shortens the lifespan of your extensions and can make them visible. For a full breakdown of errors to sidestep, the guide on extension mistakes to avoid covers the most frequent issues in detail.
How to care for and remove quick install extensions
Aftercare determines how long your extensions last and how healthy your natural hair stays throughout the process.
Clip-in aftercare:
- Remove clip-ins before sleeping. Wearing them overnight causes unnecessary tension on the roots and can lead to breakage over time.
- Wash clip-in wefts only when needed, roughly every 15 to 20 wears, using a gentle sulphate-free shampoo.
- Store wefts flat or rolled loosely in a box or bag. Avoid bundling them tightly, which causes tangling and matting.
- Clip-ins can be worn for a few days at a stretch or removed each evening, giving you complete control over wear time.
Tape-in aftercare:
- Do not wash your hair for 48 hours after installation. This allows the adhesive to fully bond.
- Keep oils and serums away from the tape bonds at all times. Even a small amount of product residue causes premature slippage, regardless of how well the extensions were applied.
- Brush gently from the ends upward using a soft-bristle or loop brush. Never tug at the bonds.
- Sleep with your hair in a loose plait to reduce friction and tangling overnight.
Pro Tip: Apply a small amount of dry shampoo to your roots between washes, but spray it at least 5 centimetres away from any tape bonds. This keeps roots fresh without compromising the adhesive.
Removing extensions safely
Clip-ins simply unclip. Open each clip, slide the weft out, and you are done. Tape-in removal requires more care. The correct method is the “soften then slide” approach: apply a dedicated adhesive remover to bonds and allow it to work for 30 to 60 seconds before gently sliding the wefts apart. Forcing tape-ins off without softening the adhesive first causes bond failure and can pull out natural hair. Improper removal is one of the primary causes of early extension failure and hair damage.
How to choose and blend extensions for a natural finish
Selecting the right extensions is just as important as installing them correctly. A perfect application with the wrong colour or texture will still look unnatural.
Colour matching:
- Hold extension samples against your hair in natural daylight, not indoor lighting. Artificial light distorts colour significantly.
- Match the mid-lengths and ends of your hair rather than the roots. Most natural hair is slightly lighter at the tips, and matching lighter shades at the ends mimics this natural fading for a more convincing result.
- If you colour your hair, match extensions to your most recent shade and plan to update them when you next colour.
Texture and weight:
- Straight extensions on naturally wavy hair will look mismatched unless you wave them to match. Matching extension texture to your natural hair sometimes requires professional perming or texturing for the best result.
- Choose extension weight relative to your natural hair density. Fine hair needs lighter wefts to avoid visible pulling at the roots.
Blending techniques:
- After installation, have a small amount trimmed from the extensions to match your natural layers. This single step makes the biggest difference to how undetectable they look.
- Place wefts strategically so they sit beneath your natural hair, never at the very top layer.
- For further guidance, the article on blending extensions naturally offers detailed placement and styling advice.
When in doubt about colour or texture, consult a colourist before purchasing. Getting the shade right first time saves money and avoids the frustration of returns.
Key takeaways
Quick install hair extensions deliver immediate results when you choose the right type, prepare your hair correctly, and follow proper aftercare to protect both the extensions and your natural hair.
| Point | Details |
|---|---|
| Choose the right method | Clip-ins suit flexible, short-term wear; tape-ins suit longer-lasting semi-permanent results. |
| Prepare hair properly | Clean, dry, product-free hair is non-negotiable for both clip-in grip and tape-in adhesion. |
| Install in layers | Work from the nape upward in horizontal sections for the most natural and secure placement. |
| Protect the bonds | Keep oils and serums away from tape bonds to prevent premature slippage and early failure. |
| Remove with care | Use adhesive remover on tape-ins for 30 to 60 seconds before sliding wefts apart to avoid hair damage. |
What I have learned from years with quick install extensions
I have seen a lot of first-time extension users make the same mistake: they focus entirely on the installation and give almost no thought to the removal. The result is damaged hair, frustrated customers, and a belief that extensions simply “do not work” for them. The truth is that clip-ins and tape-ins are genuinely forgiving methods when you respect the process from start to finish.
The other thing I would say honestly is that colour matching is harder than most people expect. Online swatches are useful as a starting point, but they are not reliable enough to buy on alone. Ordering a sample before committing to a full set saves a lot of disappointment. Naturylextensions offers a range of shades in Remy human hair, and taking the time to compare samples in daylight before purchasing makes a real difference to the final result.
For anyone trying extensions for the first time, clip-ins are the right place to start. They teach you where to place wefts, how your hair behaves with added weight, and what length and volume actually suit your face. Once you have that knowledge, moving to tape-ins or invisible wire extensions feels far less daunting. And if you are ever unsure whether a result looks natural, the guide on achieving a natural look is worth reading before you buy.
— Sam
Ready to try quick install extensions from Naturylextensions?
Naturylextensions specialises in Remy human hair extensions designed for easy at-home use, with a natural finish that holds up to daily styling. The range includes invisible wire extensions that sit comfortably without clips or tape, alongside options for added length and volume.
If you are looking for a specific length, the 16 inch extension collection offers a popular mid-length option that blends well with most natural hair lengths. For those wanting to build on an existing set, additional length wires are available separately. All orders come with fast UK delivery and a free exchange policy, so finding your perfect match is straightforward and low risk.
FAQ
How long do quick install extensions take to put in?
Clip-in extensions take under 15 minutes for a full head once you are familiar with the process. Tape-in extensions take approximately 30 to 60 minutes for a complete installation.
Can I install tape-in extensions at home without a stylist?
Yes, tape-in extensions can be self-installed at home with practice. The key steps are clean, dry hair, thin sectioning, and the sandwich method of pressing two tape tabs around each panel.
How often should I wash clip-in extensions?
Wash clip-in wefts approximately every 15 to 20 wears using a sulphate-free shampoo. Washing too frequently strips the hair of moisture and shortens the lifespan of the extensions.
What is the safest way to remove tape-in extensions?
Apply a dedicated adhesive remover to each bond and allow it to soften for 30 to 60 seconds before sliding the wefts apart. Forcing removal without softening the adhesive causes hair breakage and bond damage.
How do I match extension colour to my natural hair?
Compare extension samples against your hair in natural daylight and match to the mid-lengths and ends rather than the roots. Choosing a shade slightly lighter at the tips replicates the natural fading most hair has towards the ends.


