TL;DR:
- Creating a textured ponytail can be quick and natural-looking with six precise steps that focus on building a firm base. Using quality Remy human hair extensions responds to heat like natural hair, ensuring a seamless blend, especially when attachment and blending techniques are correctly applied. Proper preparation, including securing a tight base and choosing the right texture techniques, helps achieve a polished style that lasts and is easy to fix if problems arise.
You can create a natural, textured ponytail in a short time using six precise steps, with or without Remy ponytail extensions. A firm base ponytail is the single most important step — everything else builds on it.
Six-step summary:
- The process involves preparation, base ponytail creation, adding texture through various methods, optionally attaching an extension, blending the look, and finishing with hairspray.
The total time varies depending on your chosen texture method and whether you are adding an extension.
Table of Contents
- What tools and products do you need?
- How to create a textured ponytail step by step
- Which texture techniques work without extensions?
- How do you attach and blend Remy ponytail extensions?
- Common problems and how to fix them quickly
- How does hair length and type change the style?
- How long does the style last, and how do you care for it?
- Key takeaways
- Why Remy extensions make this style easier
- Ready-made Remy ponytail extensions from Naturylextensions
- Useful sources and further reading
- FAQ
What tools and products do you need?
Gathering everything before you start saves time and prevents mid-style scrambling. Here is what to have on hand.
Essential tools:
- Paddle brush and fine-tooth comb
- Strong hair ties (silicone-coated or fabric-covered to reduce breakage)
- Bobby pins (at least six)
- Sectioning clips
Styling products:
- Texturising or sea-salt spray
- Dry shampoo (adds grip and absorbs oil at the root)
- Heat protectant spray
- Light-hold hairspray
- Volumising mousse (optional, for fine hair)
If you are using a Remy ponytail extension: look for one with a comb or clip plus a wrap-around section. Naturylextensions’s clip-in Remy ponytail extensions are made from 100% Remy human hair, which means they respond to heat tools exactly as your natural hair does. Before buying, check that the shade matches your own hair — Naturylextensions offers a free colour-match service to help. For guidance on which weight and style suits your hair type, the types of ponytail extensions guide is a practical starting point.
Pro Tip: Use a silicone-coated hair tie for your base ponytail. It grips without slipping and leaves no dent if you need to reposition the ponytail mid-style.
How to create a textured ponytail step by step
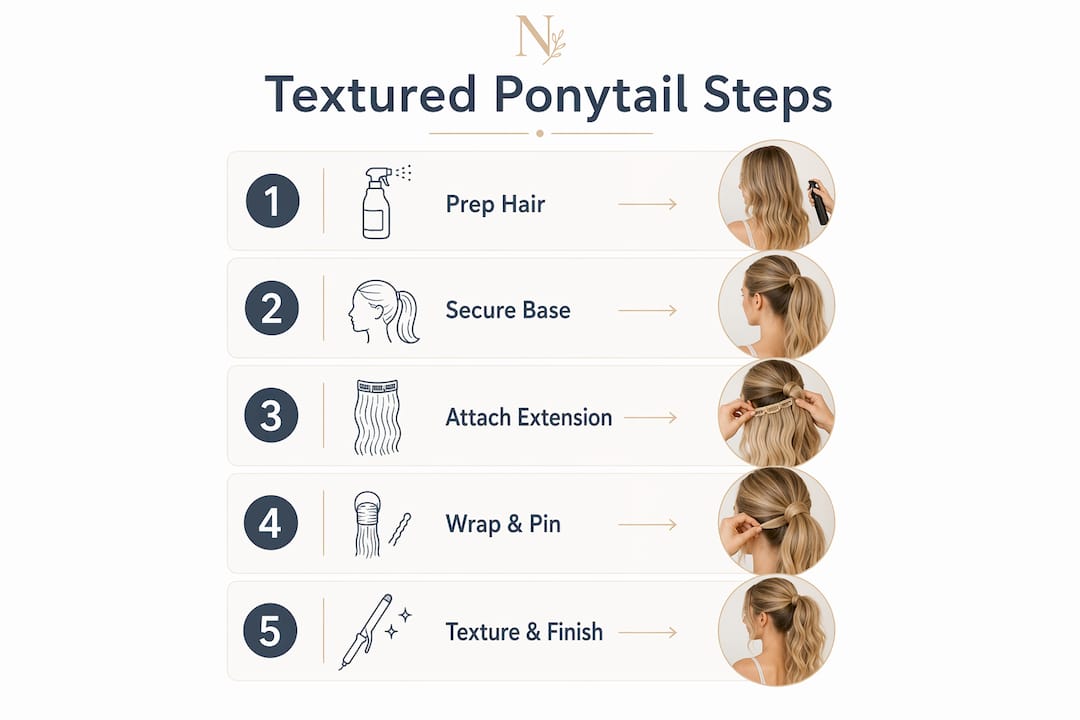
Work through these numbered steps in order. Timings are approximate.
- Prep your hair (5 min). Start with clean or refreshed hair. If washing, blow-dry with a round brush for light volume at the root. Mist heat protectant through mid-lengths and ends before any hot tool touches your hair.
- Section and smooth (2 min). Clip away a small section at the crown. Brush the rest back smoothly to your chosen height — high for bounce, mid for balance, low for a sleek, elongated look.
- Tie the base ponytail (1 min). Secure firmly with your silicone-coated tie. Tug the ponytail gently; it should not shift. A loose base means the whole style, and any extension, will slip.
- Apply your texture method (5–10 min). Choose one: backcomb the ponytail from underneath using a fine-tooth comb, working in short upward strokes; or spritz sea-salt spray through the lengths and scrunch; or curl with a large-barrel tong, then break the curls apart with your fingers. A curl-then-tousle approach creates defined movement that texturising spray then amplifies.
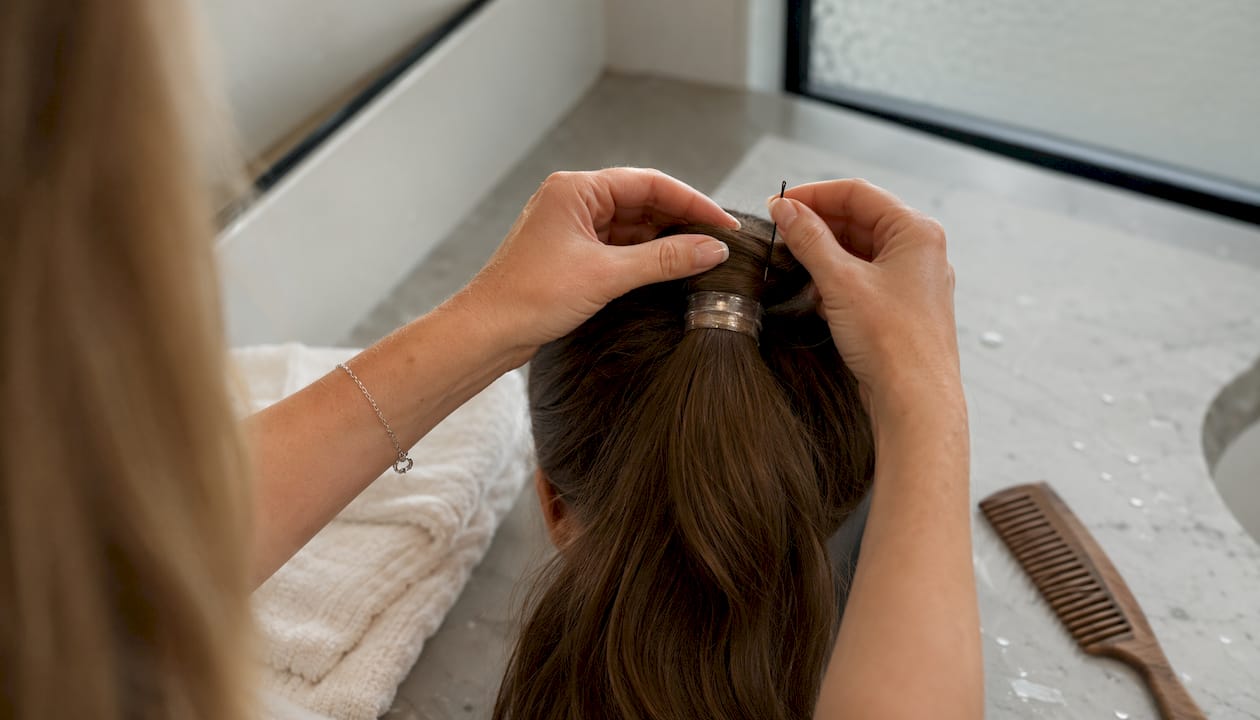
- Attach the extension if using (3–5 min). Slide the comb just above the hair tie so its teeth bite into the base hair. Wrap the extension’s band around the tie, pull it snug, and secure with two to three bobby pins underneath the visible hair, not on top.
- Blend and finish (5 min). Run a large-barrel tong quickly through both your natural hair and the extension together to unify the wave pattern. Smooth any flyaways with a light mist of hairspray, and gently lay down baby hairs with a soft brush or a clean mascara wand.
Pro Tip: If you notice bulk at the base after attaching the extension, slide one bobby pin horizontally across the wrap and tuck it under the ponytail. That single pin distributes the weight and flattens the join.
Which texture techniques work without extensions?
These methods work on their own or as prep before attaching a Remy extension.
- Backcombing: Hold the ponytail taut and use a fine-tooth comb to push hair downward toward the root in short, controlled strokes. Work the underneath layers only — the top layer stays smooth and hides the texture beneath.
- Sea-salt or texturising spray: Spritz some spray through dry mid-lengths, then scrunch upward. Apply before heat styling for grip, or after curling to break up definition. Avoid the root area if your hair is fine, as it can flatten volume there.
- Curling for movement: Wrap sections around a large barrel curling iron, hold briefly, and release. Once cool, run your fingers through to separate. This curl-then-break-apart method gives long ponytails swing and bounce.
- Braids as a no-heat texturiser: Divide the ponytail into three sections and plait each loosely. Leave for 20–30 minutes (or overnight for stronger texture), then release and finger-comb. For a professional finish on braided styles, Awani Hair Braiding offers expert guidance on braid techniques and tousled release methods.
Pro Tip: For long or thick hair, combine backcombing at the root with a light curl through the ends. For shorter hair, skip the curl and rely on sea-salt spray alone — too many techniques on shorter lengths creates frizz rather than texture.
How do you attach and blend Remy ponytail extensions?
Ready-made Remy extensions include a small comb or clip and a wrap-around section that fastens with Velcro or a band. Here is how to use them correctly.
- Comb placement: Slide the comb under or just above the hair tie so the teeth grip the base hair. Never place it on top — the extension will sit too high and the join will be visible.
- Wrapping: Pull the wrap-around section tightly around the hair tie, covering it completely. Secure with the Velcro or band, then add two bobby pins beneath the wrap for extra hold.
- Colour and texture match: Naturylextensions’s Remy hair styling guide recommends matching texture first (straight to straight, wave to wave) and then colour. Use the AI colour-match service on the Naturylextensions site, or order a shade swatch before committing to a full piece.
- Blending: Style your natural hair and the extension with the same barrel size and temperature. Running a tong through both together unifies the wave pattern and makes the join far less visible.
- Avoiding bulk mismatch on fine hair: Choose a lighter-weight extension, or split the extension into two smaller wraps secured at staggered points to distribute thickness evenly.
- Immediate aftercare: Once styled, brush the extension gently with a wide-tooth comb from ends to root. Avoid heavy oils or serums on the extension that day — they loosen the wrap’s grip.
Pro Tip: In windy conditions, add a small clear elastic halfway down the ponytail to keep the extension anchored and prevent it lifting away from your natural hair.
Common problems and how to fix them quickly
Slippage: Usually caused by a loose base, a smooth hair tie, or oily roots. Re-tie the base ponytail firmly, dust dry shampoo at the root for grip, and add a discreet elastic underneath the main tie before reattaching the extension.
Limp tail with no movement: Backcomb only the root section of the ponytail, not the full length. Then re-spritz sea-salt spray through the mid-lengths and scrunch. Adding a light curl to just the bottom third restores bounce without overworking the hair.
Visible seam or bulky base: Reposition the wrap so it sits flat, then take a small section of your natural hair and wind it around the base to conceal the join. Pin it underneath with two bobby pins. If the bulk is still noticeable, the extension may be too heavy for your hair — a lighter or split-wrap option will resolve it.
Emergency kit for your bag: Two small elastics, a travel-size texturising spray, and four bobby pins. That covers every common mid-day fix in under two minutes.
Pro Tip: Before leaving the house, tug the ponytail gently from side to side. If it shifts, re-tie and re-pin. A 30-second check saves an embarrassing mid-afternoon collapse.
How does hair length and type change the style?
- Short hair: Use a lower ponytail placement to maximise the length you have. A smaller, lighter extension adds length without overwhelming fine strands. Tease the crown section before tying to create the illusion of height.
- Medium-length hair: A mid-height ponytail with soft waves and light backcombing gives the most natural-looking result. This length blends with extensions most easily.
- Long or thick hair: Distribute bulk by using two smaller wraps rather than one heavy wrap, secured at staggered points. Reinforce with extra pins to prevent the weight pulling the base loose.
- Placement effects: A high ponytail lifts the crown and adds perceived volume. A low ponytail elongates the neck and reads as more polished. Mid-height sits between both.
- Fine hair: Keep the extension lightweight and use volumising mousse at the root before tying. See ponytail extension examples for visual references across different hair lengths.
- Thick hair: A heavier extension blends more naturally, but still wrap in two sections to keep the base flat.
How long does the style last, and how do you care for it?
Heat guidance: Style Remy human hair extensions at 150°C–180°C. Always apply heat protectant first, and avoid repeated passes over the same section. Naturylextensions’s Remy extensions are heat-styling compatible, but lower temperatures preserve the hair’s condition over time.
Product rules:
- Avoid heavy oils, silicone serums, and sulphate shampoos on the extension.
- Use lightweight, alcohol-free products only.
- Do not apply dry shampoo directly to the extension — it dries out Remy hair.
Longevity: A textured ponytail without extensions typically holds well for one day. With a Remy extension properly secured, the style can last through a full day and evening without re-pinning.
Storage: Remove the extension before sleeping. Brush it gently, mist lightly with a leave-in conditioner spray, and store flat or loosely coiled in a breathable bag.
Pro Tip: Refresh the style the next morning by spritzing a little texturising spray and scrunching. The texture often improves overnight as the hair settles.
Key takeaways
A firm base ponytail is the foundation of every successful textured style — get that right, and the texture, extension, and finish all follow naturally.
| Point | Details |
|---|---|
| Secure the base first | A firm, silicone-tied base prevents slippage for both the style and any extension. |
| Match texture before colour | Style your natural hair and extension with the same barrel and pattern before blending. |
| Choose the right technique | Backcombing, sea-salt spray, and curl-then-tousle each suit different hair lengths and types. |
| Fix problems fast | Dry shampoo, a re-tie, and two bobby pins resolve most slippage and bulk issues in minutes. |
| Naturylextensions Remy extensions | Heat-styling compatible and available with free colour matching and UK exchanges for low-risk buying. |
Why Remy extensions make this style easier
The textured ponytail is one of those styles that looks effortless but rewards good preparation. What most tutorials underplay is how much the quality of the extension material affects the final result. Synthetic fibres do not respond to heat the same way natural hair does, which means you end up with two visibly different textures no matter how carefully you blend. Remy human hair, by contrast, takes curl, wave, and spray in exactly the same way as your own hair — so the join disappears when you run a tong through both together.
The other thing worth saying plainly: the base ponytail matters more than any product you apply. A loose base is the root cause of almost every problem readers describe, from slippage to visible seams. Spend an extra 60 seconds getting that tie genuinely firm, and the rest of the style becomes much simpler. The step-by-step install guide on the Naturylextensions blog goes deeper on attachment technique and includes photos that make the comb placement far clearer than any written description.
Ready-made Remy ponytail extensions from Naturylextensions
If you want instant volume and length without building texture from scratch, Naturylextensions’s clip-in Remy ponytail extensions are designed for exactly that. Each piece is made from 100% Remy human hair, attaches in minutes with a comb-and-wrap system, and can be curled, waved, or straightened to match whatever texture you are creating.
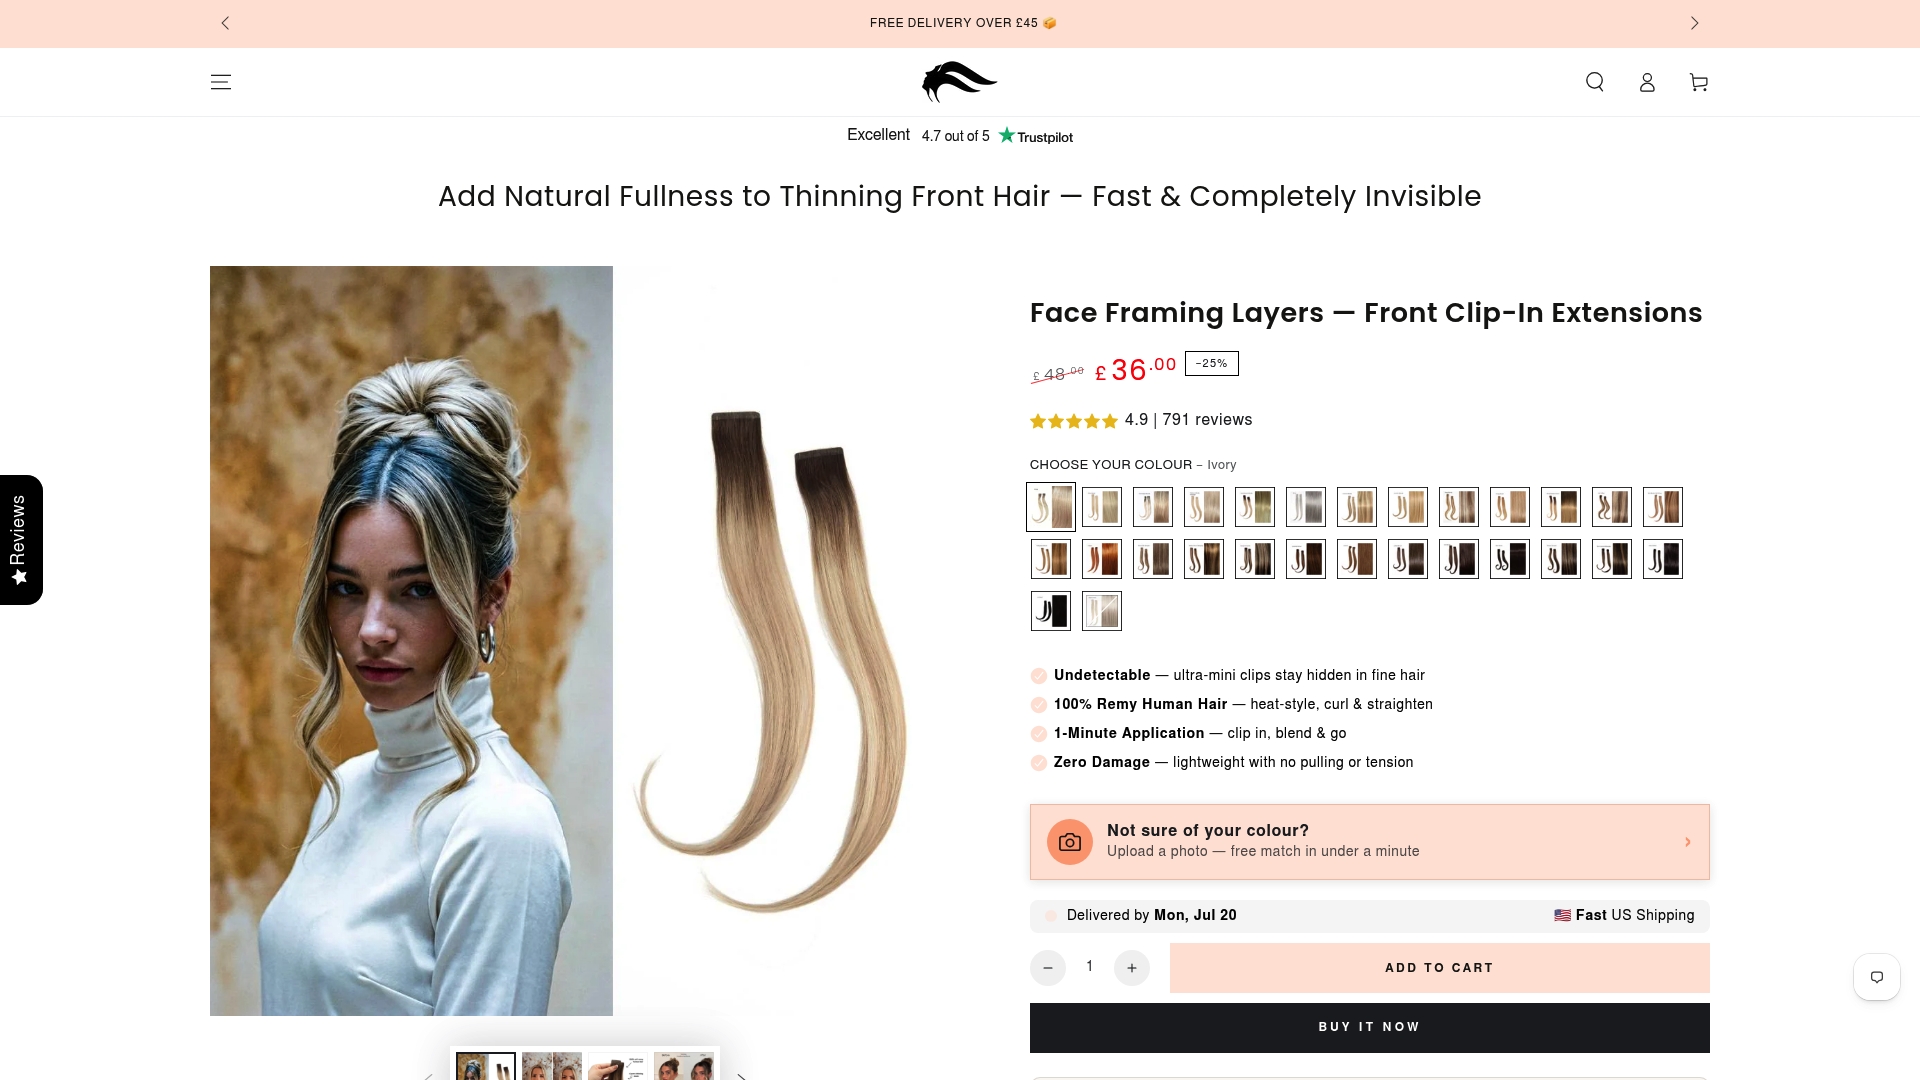
Colour matching is free — use the AI colour-match tool on the site or request a shade swatch before ordering. If the colour is not quite right when it arrives, the free exchange policy means you can swap it without hassle, and fast UK delivery means you are not waiting long either. Follow the step-by-step install guide on the blog for best results, and you will have a natural-looking textured ponytail ready in under 30 minutes.
Useful sources and further reading
- Install ponytail extensions: step-by-step guide — best for numbered steps and attachment photos.
- How to style ponytail extensions naturally — covers blending, smoothing and finishing in detail.
- Ponytail extension examples for fuller, longer hair — visual reference for different hair lengths and volumes.
- Messy ponytail extension tutorial — quick hacks for a relaxed, tousled finish.
- Beautylish: textured ponytail video tutorial — useful for seeing the curl-then-tousle technique in motion.
FAQ
How long does a textured ponytail take to create?
With or without an extension, the full process takes 10–30 minutes. Prep and base ponytail account for roughly eight minutes; the texture method and finishing take the rest.
Do Remy ponytail extensions damage your natural hair?
Clip-in and comb-based Remy extensions do not damage natural hair when attached and removed correctly. The key is a firm but not over-tight base ponytail, and always removing the extension before sleeping.
How do I stop my ponytail extension from slipping?
Start with a genuinely firm base ponytail tied with a silicone-coated elastic, dust dry shampoo at the root for grip, and secure the extension’s wrap with at least two bobby pins beneath the visible hair.
Can I use heat tools on Remy ponytail extensions?
Yes. Remy human hair extensions are heat-styling compatible. Use a heat protectant and keep the temperature between 150°C and 180°C to protect the hair’s condition over repeated wears.
Which ponytail extension suits fine hair?
A lighter-weight extension, or one split into two smaller wraps secured at staggered points, distributes thickness evenly and avoids bulk mismatch on fine hair. The types of ponytail extensions guide explains which styles suit different hair weights.