


TL;DR:
- Proper preparation and tools are essential for a secure, natural-looking ponytail extension.
- Following a step-by-step workflow ensures quick, flawless attachment and blending.
- Post-installation care and subtle styling techniques help maintain a seamless, long-lasting look.
You have a big night out in an hour, your natural hair is not cooperating, and you want a full, polished ponytail without booking a salon appointment. Sound familiar? Ponytail extensions are one of the fastest ways to transform your look, but a poor install can leave you with slipping pieces, visible joins, or an uncomfortable base that ruins your confidence before you even leave the house. This guide walks you through every stage, from gathering the right tools and prepping your hair to attaching, blending, and caring for your extensions, so you can achieve a result you are genuinely proud of.
Table of Contents
- What you need: prepping for perfect ponytail extensions
- Step-by-step ponytail extension workflow
- Troubleshooting and avoiding common extension install mistakes
- Finishing touches: styling and caring for your installed ponytail
- What most guides miss about truly seamless ponytail extensions
- Upgrade your look with premium extensions
- Frequently asked questions
Key Takeaways
| Point | Details |
|---|---|
| Prep is crucial | Clean, smooth hair helps you achieve a secure and natural ponytail extension. |
| Follow clear steps | A proper installation workflow delivers style and confidence in minutes. |
| Avoid common mistakes | Steer clear of oily roots, loose ponytails, and visible joins for flawless results. |
| Stylish, lasting finish | Blend, style, and maintain your look to enjoy a salon-quality transformation at home. |
What you need: prepping for perfect ponytail extensions
A flawless install starts long before the extension ever touches your hair. Getting your tools and hair ready is the single most important thing you can do to guarantee a secure, natural-looking result. Prepping hair for extensions is often underestimated, yet it directly affects how well your ponytail stays in place all day.
Your essential kit
| Item | Purpose |
|---|---|
| Clean, dry hair | Creates grip for a secure hold |
| Paddle brush or wide-tooth comb | Smooths hair before styling |
| Strong hair tie | Holds your base ponytail firmly |
| Bobby pins | Secures the extension and hides tracks |
| Ponytail extension piece | The star of the show |
| Lightweight texturising spray | Adds grip, especially for fine hair |
| Mirror (front and back) | Lets you check blending from all angles |
Having every item within reach before you begin saves time and reduces the temptation to rush steps. Rushing is where most install errors creep in.
Common mistakes to avoid before you start
- Installing on oily or product-heavy hair. Oils reduce grip and cause extensions to slip within hours.
- Skipping the brush-through. Tangles at the root make the base lumpy, which shows under the extension.
- Using the wrong hair tie. A thin or stretched tie will not hold the base securely enough.
- Forgetting a back mirror. You cannot blend what you cannot see.
As a general rule, wash and dry your hair thoroughly the day before your install, brush it smooth, and avoid applying any oils or serums at the roots. Day-old clean hair actually has a natural texture that grips extensions better than freshly washed hair.
Pro Tip: If your hair is fine or particularly slippery, mist a little texturising spray onto your roots and lightly tease the base before securing your hair tie. This creates extra friction so the extension sits firmly without needing constant readjustment.
Caring for your natural hair during the lead-up to an install also matters. Keeping your hair moisturised, trimmed, and healthy means a stronger, more even base to work with.

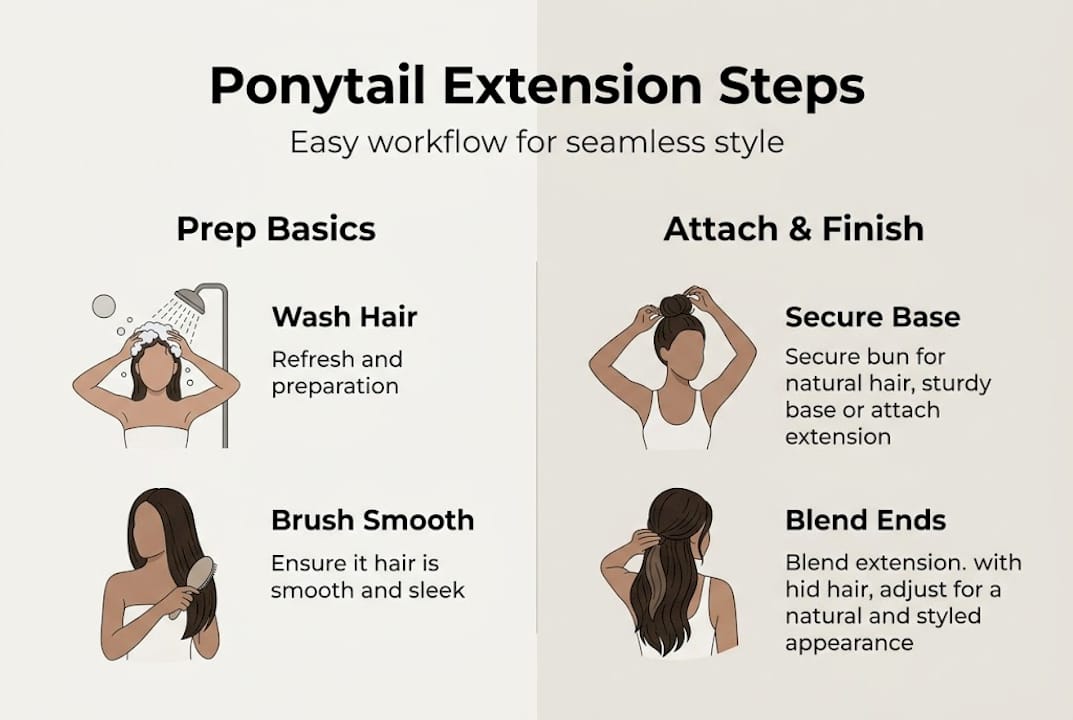
Step-by-step ponytail extension workflow
With your kit assembled and hair prepared, it is time to follow the proven workflow for flawless results. The standard install process is straightforward once you break it into clear stages, and with a little practice, the whole thing takes under ten minutes.
The workflow
- Create your base ponytail. Brush your natural hair into a ponytail at your desired height, whether low, mid, or high. Secure firmly with a strong hair tie. Make sure the base is smooth with no bumps.
- Position the extension. Hold your ponytail extension at the base of your ponytail. Align it so the attachment sits just above your hair tie.
- Secure the attachment. Fasten the clip, Velcro strip, or wire around your base ponytail, depending on your extension type. Pull it snug but not so tight that it is uncomfortable.
- Add bobby pins for extra security. Cross two bobby pins over the base to prevent any rotation or sliding during wear.
- Blend the lengths. Gently fan your natural hair and the extension together using your fingers or a wide-tooth comb. Focus on the point where they meet.
- Wrap and finish. Take a small strand from the extension (or your natural hair if it is long enough) and wrap it around the base to conceal the hair tie and attachment. Secure the end with a bobby pin tucked underneath.
Attachment types compared
| Attachment type | Speed | Security | Ease of use |
|---|---|---|---|
| Clip | Very fast | High | Very easy |
| Velcro | Fast | Medium | Easy |
| Wire/drawstring | Moderate | Very high | Moderate |
For styling ponytail extensions into waves, curls, or sleek straight looks, always complete the attachment and blending steps first. Styling a properly secured extension is far easier and gives a more polished outcome.
Pro Tip: Wrapping a small strand around the base is the single quickest way to elevate your ponytail from looking like an obvious clip-in to something that looks genuinely grown from your scalp. It takes thirty seconds and makes a significant difference. Find inspiration for fuller ponytails to see just how natural this technique looks in practice.
Troubleshooting and avoiding common extension install mistakes
Even with a strong workflow, a few missteps can compromise the final look. Here is how to spot and solve them before they become a problem.
Quick fixes for the most common issues
- Slipping extension. Your base ponytail is probably too smooth. Remove the extension, tease the root area lightly, and reattach. Add an extra bobby pin if needed.
- Visible tracks or joins. The wrapped strand has come loose, or you have not blended the meeting point thoroughly. Re-wrap and use a fine-tooth comb to gently smooth the area where your hair meets the extension.
- Lumpy base. Your base ponytail has bumps underneath. Take it down, brush from root to tip, and re-tie before reattaching the extension.
- Extension feels heavy or uncomfortable. Check that the attachment is not gripping too tightly. Reposition slightly lower or higher until you find a comfortable angle.
There are several extension mistakes to avoid that most guides gloss over, including one area that deserves particular attention:
Safety first. Avoid adhesives and heat tools during a standard ponytail extension install. Adhesives can damage your natural hair and are difficult to remove cleanly, while excessive heat applied directly to the attachment point can weaken the extension fibres and cause breakage.
Getting the basics right dramatically improves your results. Studies from hair care specialists consistently show that the majority of extension failures are directly linked to skipping proper prep steps such as installing on dirty or oily hair, using a loose or overly tight base, and poor blending at the join. Addressing each of these before you leave the house is the key to an install that holds all day.
Before heading out, do a final check. Run your fingers along the base to feel for any loose sections. Give your head a gentle shake. Look at the join from the back using two mirrors. If everything feels secure and looks seamless, you are good to go. For a deeper understanding of your options, reading all about ponytail extensions can help you choose the right style and attachment method for your hair type.
Finishing touches: styling and caring for your installed ponytail
After mastering attachment and avoiding pitfalls, the final stage is refining your look for long-lasting wear and healthy hair. This is where your ponytail goes from good to genuinely impressive.
Styling tricks for a polished finish
- Add volume at the crown. Before securing your base ponytail, lightly backcomb the top section of your hair. This lifts the crown and makes the overall shape look fuller and more intentional.
- Smooth the outer layer. Once the extension is attached, use a soft bristle brush to smooth just the surface layer of hair over the base. This removes any frizz without disturbing the teased volume underneath.
- Hide your bobby pins. Slide bobby pins in the direction of your hair rather than across it, and tuck the ends underneath so they are invisible from all angles.
- Use a light-hold finishing spray. A small amount of flexible hold spray keeps flyaways in check without stiffening the overall look.
As the expert guidance confirms, teasing roots for volume blend, braiding the base for fine hair grip, and applying a light texturising spray all prevent slippage and create a more convincing result throughout the day.
Aftercare essentials
Removing your ponytail extension correctly matters just as much as installing it. Gently unfasten the attachment rather than pulling, and detangle the extension from tip to root using a soft paddle brush before storing it flat or on a hanger. Avoid bundling it up loosely, as this causes tangling and shortens the lifespan of the piece.
Exploring different ways to style extensions can also inspire new looks without compromising the health of either your natural hair or the extension itself. Understanding the types of ponytail extensions available helps you choose the right piece for your next install.
Pro Tip: To refresh a next-day style, mist the extension lightly with water mixed with a small amount of conditioner, scrunch gently, and allow to air dry. This revives texture and shine without the need for heat.
What most guides miss about truly seamless ponytail extensions
Most step-by-step guides do a reasonable job of covering the install process itself. What they rarely address is what happens after you walk out the door. A ponytail extension that looks perfect in your bathroom mirror can shift, flatten, or separate throughout the day if you have not accounted for movement, humidity, and your natural hair texture.
The real secret to seamless wear is a combination of subtle root teasing, periodic grip checks (a quick press at the base every few hours keeps things tidy), and choosing an extension that genuinely matches your texture rather than just your colour. Fine hair needs a different weight and attachment style than thick hair, and no amount of perfect technique compensates for a mismatched product.
We have also noticed that the small investment of time spent on prep, both the night before and on the day, pays back tenfold in confidence. When you know your extension is secure, you stop worrying about it and start enjoying your look. Natural ponytail styling tips can help you build a routine that feels second nature rather than stressful.
Upgrade your look with premium extensions
Ready to turn your knowledge into your best ever ponytail? At Naturyl Extensions, we offer a curated range of Remy human hair extensions designed to blend naturally, hold securely, and feel genuinely comfortable all day long.
From 16 inch extensions suited to everyday length boosts to longer, fuller options for dramatic transformations, our collection covers multiple lengths and shades to match your natural hair precisely. Every piece uses ethically sourced Remy hair, meaning the cuticles are aligned for a smoother, more natural finish. Not sure where to start? Our guide on what is Remy hair explains exactly what sets it apart. Browse the full range and find your perfect match today.
Frequently asked questions
How long does it take to install ponytail extensions with this workflow?
On average, this workflow takes 5 to 10 minutes, and with regular practice you will find it becomes even quicker.
Can I use heat tools or adhesive with ponytail extensions?
It is best to avoid adhesives and heat during a standard ponytail extension install, as both can cause damage and weaken the attachment over time.
How do I prevent my ponytail extension from slipping?
Make sure your hair is clean, tease the base lightly with a comb, and secure the attachment firmly with bobby pins crossed at the base.
How do I blend my natural hair with the extension?
Wrap a small strand around the base and secure with bobby pins tucked underneath to hide the join and create a seamless, natural-looking finish.


