


TL;DR:
- Choosing the right extensions and proper preparation are essential for creating long-lasting, natural-looking braided styles. Synthetic and human hair extensions differ in texture, durability, and safety, with careful matching and quality sourcing improving results and safety. Regular aftercare, including moisturizing, gentle washing, and avoiding tight tension, helps extend the life of braids and maintain scalp health over time.
Whether your natural hair lacks length, volume, or simply won’t hold a braid past day two, braiding with hair extensions changes what’s possible. Extensions give you the raw material to create styles that last, look fuller, and hold their shape far longer than natural hair alone. But getting that result requires more than just buying a pack of braiding hair and hoping for the best. This guide covers everything from choosing the right extensions and preparing your hair, to executing specific techniques and keeping your style looking fresh for weeks.
Table of Contents
- Key takeaways
- Braiding with hair extensions: choosing the right type
- Preparation before you start braiding
- Step-by-step braiding techniques with extensions
- Aftercare and maintenance for braided extensions
- My honest take on braiding with extensions
- Discover Naturylextensions for your next braid style
- FAQ
Key takeaways
| Point | Details |
|---|---|
| Choose extensions carefully | Synthetic and human hair extensions differ in texture, durability, and safety profile. |
| Prep is non-negotiable | Washing, conditioning, and sectioning your natural hair before braiding protects scalp health and braid longevity. |
| Feed-in technique reduces tension | Gradually adding extensions from root to tip creates a natural look and reduces scalp stress. |
| Match texture and colour precisely | Invisible transitions in braids depend on near-perfect texture and colour matching. |
| Aftercare extends style life | Regular moisturising, gentle washing, and nightly satin protection keep braids intact longer. |
Braiding with hair extensions: choosing the right type
Before you pick up a comb or section a single strand, the extensions you choose will determine almost everything else. Get this decision wrong and you’ll struggle with blending, texture mismatches, or worse, scalp irritation.
Synthetic vs human hair
Synthetic braiding hair such as Kanekalon or pre-stretched fibre is affordable, lightweight, and comes in an enormous range of colours. Kanekalon is particularly popular because it holds curls well and is easy to braid at speed. Pre-stretched versions save you the manual stretching step and feel softer against the scalp.
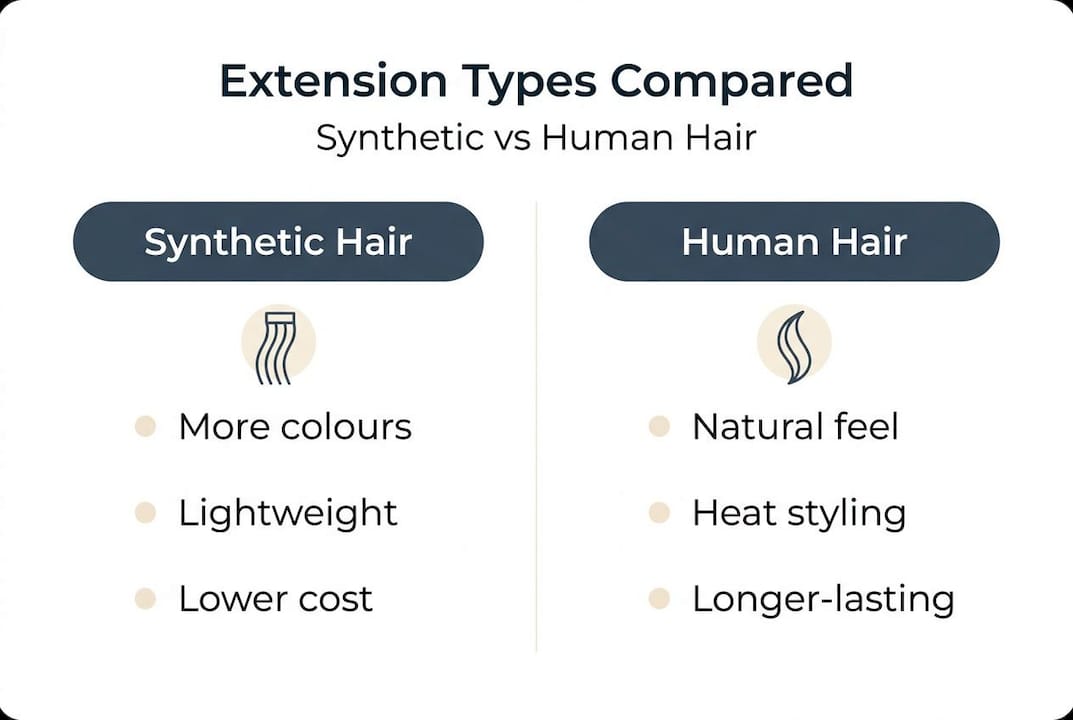
Human hair extensions offer a more natural texture and greater styling flexibility. You can apply heat to them, they blend more naturally with your own hair, and they tend to look more realistic under close inspection. However, the best hair extensions for braiding aren’t always the most expensive. The right choice depends on your styling goals, budget, and how long you plan to wear the style.
There is an important safety consideration that most guides skip entirely. Heavy metals including lead were detected in 29 of 30 braiding hair products tested in recent Consumer Reports investigation, affecting both synthetic and human hair products. This finding matters because many women assume human or plant-based extensions are automatically safer. They are not always.
| Extension type | Texture | Durability | Safety notes |
|---|---|---|---|
| Kanekalon synthetic | Smooth, lightweight | Moderate (4-6 weeks) | Check for hypoallergenic labelling |
| Pre-stretched synthetic | Soft, malleable | Moderate (4-6 weeks) | Avoid burning or boiling ends |
| Human Remy hair | Natural, blendable | High (6-8 weeks) | Source from reputable suppliers |
| Yaki texture synthetic | Mimics relaxed hair | Moderate | Good for natural hair blending |
Pro Tip: Look for products marketed as hypoallergenic. One product without detectable heavy metals in Consumer Reports testing was Dosso Beauty’s Hypoallergenic Kanekalon Braiding Hair, which shows that safer options do exist. Read labels carefully and buy from transparent suppliers.
Tools you will need
- Rat-tail comb for precise sectioning
- Duckbill or butterfly clips to hold sections
- Elastic bands or small hair ties
- Edge control gel or braiding wax
- C-curve weaving needle and nylon thread (for sew-in methods)
- Light oil spray for scalp moisture
Preparation before you start braiding
A strong braid starts with a strong foundation. Rushing past this stage is one of the most common reasons braids look uneven or don’t last.
- Wash and condition your natural hair. Start with a clean scalp. Product build-up left in your hair creates a barrier that shortens braid life and can lead to irritation under the weight of extensions. Use a clarifying shampoo followed by a moisturising conditioner.
- Detangle thoroughly. Work through your hair in sections using a wide-tooth comb, starting from the ends and working upward. Detangling dry or partially damp hair is easier on the strand than working through soaking wet hair.
- Blow-dry to a stretched state. You don’t need to blast your hair bone dry, but stretching it with a blow dryer on a low heat setting makes sectioning cleaner and prevents shrinkage from disrupting your parting lines.
- Moisturise before braiding. Apply a light leave-in conditioner or hair oil to your natural hair before you start. Your scalp will be under an extension for weeks. Giving it a moisture boost first makes a noticeable difference to comfort and hair health over time.
- Section with precision. Use your rat-tail comb and clips to create clean, even sections. The size of each section determines the thickness of each braid, so decide on your finished look before you part the hair. Mark sections with clips as you go so nothing shifts.
- Apply edge control. Smooth your edges and any flyaways before beginning each braid. This keeps the foundation neat and makes the finished style look polished from root to tip.
Pro Tip: If you plan to use the feed-in method, make your initial natural hair section slightly smaller than you think you need. You’ll be adding extension hair as you go, so starting lean keeps the root from looking bulky.
Step-by-step braiding techniques with extensions
This is where most braid extensions tutorials either go too vague or skip the details that actually matter. Here are three core hair extension braiding techniques explained clearly.
The feed-in method
The feed-in method is currently the most popular approach for a reason. Adding extensions gradually from root to tip, rather than folding a large bulk of hair in at the root, dramatically reduces tension and produces a more natural look. Knotless braids use this exact principle and can last up to two months when installed correctly.
- Begin with a small amount of your natural hair and start braiding without any extension hair for the first two or three weaves.
- Take a small piece of extension hair and lay it flat against the braid section. Fold it over one strand and continue braiding it in.
- After two or three more passes, add another small piece of extension hair. Keep the added pieces thin so each addition blends invisibly.
- Continue this pattern all the way to the end of the braid, increasing the amount of extension hair slightly as you move further from the root.
- Seal the end with a small elastic and, if you’re using synthetic hair, seal with warm water (not boiling). Avoid burning the ends. Burning synthetic fibre releases toxic VOCs that you then inhale.
French braid extensions technique
Adding extensions to a French braid presents a specific challenge: visible “tracks” where the extension joins the natural hair. The fix is strategic placement. When you pick up a new section of hair to cross over into the braid, place extensions underneath the middle strand rather than on top. This conceals the join point within the braid structure itself.

Start with a smaller amount of extension hair than you think looks right. It will spread as you work it in, and too much at once creates visible bulk that catches light and draws the eye.
Pro Tip: Texture and colour matching is what separates a professional-looking French braid from an obviously extended one. Hold your chosen extension hair next to your natural hair in natural light before you start. If the match isn’t close, the tracks will show regardless of technique.
The sew-in method
The sew-in is a semi-permanent method best suited to longer-term braid styles with hair extensions. Sew-in extensions installed over cornrows can hold for six to eight weeks without glue or heat, making them one of the most secure braiding methods for long hair.
- Create flat cornrows across your entire head, or in the area where you want volume and length added. Cornrows should lie flat and feel secure but not painfully tight.
- Thread a C-curve needle with nylon weaving thread doubled over for grip. The doubled thread increases hold and reduces the risk of stitches loosening over time.
- Stitch the weft of extension hair along each cornrow using a whip stitch or lock stitch. Keep the tension snug but never painful. Overly tight stitching is a direct route to traction alopecia.
- After securing each weft, gently tug the extension to test it. It should hold firm without pulling at your scalp.
Common mistakes when adding extensions to braids:
- Using too much extension hair per section, which creates visible bulk at the root
- Ignoring colour or texture differences between your natural hair and the extension
- Applying too much tension at the root in the belief that tighter equals longer-lasting
- Skipping a proper cornrow base before sewing in wefts
- Braiding extension hair on unwashed natural hair, which accelerates product build-up under the style
Aftercare and maintenance for braided extensions
You’ve put real time into your braids. What you do next determines whether they look great for two weeks or six.
- Moisturise your scalp every two to three days. Use a lightweight oil such as jojoba or sweet almond oil applied directly to the scalp with an applicator bottle. Avoid heavy creams that cause build-up between your braids.
- Wash carefully. Dilute a gentle shampoo with water in a spray bottle and apply it to your scalp in sections. Rinse thoroughly but gently. Rough scrubbing causes frizz and loosens braids at the root.
- Dry thoroughly after washing. Sitting under a hooded dryer or using a diffuser prevents your scalp from staying damp too long, which can lead to odour and scalp issues.
- Protect your braids overnight. Wrap your braids in a satin or silk scarf or sleep on a satin pillowcase. Proper maintenance including satin protection is one of the most effective ways to extend braid life and prevent frizz.
- Know when to take them down. Extended braid wear beyond the recommended period risks breakage, scalp irritation, and traction alopecia. For most sew-in and feed-in styles, eight weeks is the upper limit.
Watch for these warning signs that your braids need to come out:
- Persistent scalp tenderness or pain
- Visible new hair growth that is tangling at the root
- Noticeable hair loss around the hairline or temples
- Itching that does not respond to moisturising
Remember: braids are a protective style, not a set-and-forget one. Your scalp still needs consistent care even when your hair is tucked away.
Pro Tip: When removing braids, cut the elastic at the end first and gently unravel each braid rather than pulling. Saturate any knots with a detangling conditioner before working through them. Removing braids too quickly is one of the most common causes of unnecessary hair breakage.
My honest take on braiding with extensions
I’ve worked with enough women to know that the biggest mistake most first-timers make has nothing to do with technique. It’s choosing the wrong extension type for their hair texture and then blaming themselves when the result looks off. You cannot blend a silky synthetic extension into coarse, natural-textured hair and expect it to disappear. The starting point is always product selection, not skill.
The second thing I’d challenge is the assumption that tighter braids last longer. In my experience, the opposite is often true. Overly tight installation stresses the root, causes inflammation, and makes you want to take the style down early. A snug but comfortable braid consistently outlasts a painfully tight one because you’re not counting the days until it comes out.
I’ve also learned to be genuinely sceptical of marketing claims on extension packaging. Consumer Reports testing found heavy metals in the vast majority of braiding hair products, including those marketed as natural or human hair. That finding changed how I talk about extension safety completely. Ask about sourcing. Read ingredient information when it’s available. Your scalp is in contact with these products for weeks at a time.
For first-timers: start with the feed-in method on a simple three-strand braid before attempting cornrows or French braids with extensions. Practise the motion of adding extension hair smoothly until it feels natural. Technique builds quickly once your hands know what they’re doing.
— Sam
Discover Naturylextensions for your next braid style
If you’re ready to take your braided styles further, the quality of your extensions makes all the difference. Naturylextensions specialises in ethically sourced Remy human hair extensions designed to blend naturally with your own hair, whether you’re working through a feed-in braid, a French braid, or a full sew-in style. Remy hair means the cuticles are aligned in the same direction, which reduces tangling and gives a finish that holds up through weeks of wear. You can explore how to match your colour before you buy, so you get the right shade from the start. Naturylextensions offers fast UK delivery and a free exchange policy, so finding your perfect match is straightforward and low-risk. Browse the full range at Naturylextensions and find the length, texture, and colour that works for your next style.
FAQ
What type of hair extensions are best for braiding?
Pre-stretched Kanekalon synthetic hair and human Remy hair are the most popular options for braiding. Human Remy hair blends most naturally but synthetic Kanekalon is lighter and easier to work with for longer braids.
How do I stop extensions from showing in a French braid?
Place the extension hair underneath the middle strand when picking up new sections, and start with a smaller amount than you think you need. Colour and texture matching is equally important for invisible results.
How long do braids with extensions last?
Feed-in knotless braids can last up to two months with proper care, and sew-in extensions typically hold for six to eight weeks. Daily moisturising and overnight satin protection extend the life of both styles.
Is braiding with extensions safe?
Braiding is generally safe when done with correct tension and appropriate wear time. Be aware that many braiding hair products have been found to contain heavy metals or VOCs, so choosing reputable, clearly labelled products matters for long-term scalp health.
How often should I moisturise braided extensions?
Moisturise your scalp every two to three days using a lightweight oil applied with an applicator bottle. Avoid heavy products that cause build-up between the braids, which can lead to scalp irritation over time.


