


TL;DR:
- Modern hair extensions allow for natural-looking results at home with proper preparation and application.
- Choosing the right method and shade, and following care tips, prolongs extension lifespan and blending.
- Professional care and attention to detail ensure a flawless, damage-free, effortless transformation.
Adding length and volume to your hair should feel exciting, not stressful. Yet so many women find themselves overwhelmed by confusing advice, mismatched shades, and the very real fear of damaging their natural hair. The good news is that modern human hair extensions have made it easier than ever to achieve a seamless, natural-looking result at home, without a salon appointment or hours of effort. Whether you are completely new to extensions or simply want to refine your technique, this guide walks you through every step clearly, so you can feel confident from the very first application.
Table of Contents
- What you need for a seamless natural hair extension look
- Step by step: Applying your hair extensions for a natural finish
- Different extension methods: Time, results, and suitability
- Blending and caring for your extensions: Pro tips for a lasting, flawless look
- The truth about effortless, natural hair extension transformations
- Upgrade your look with premium, damage-free extensions
- Frequently asked questions
Key Takeaways
| Point | Details |
|---|---|
| Quick transformation | Modern extensions allow instant length and volume with minimal damage. |
| Seamless blending | Matching at the mid-shaft and blending with styling tools creates an undetectable look. |
| Damage-free styling | Choose gentle application methods and avoid harsh products for the healthiest results. |
| Types matter | Each extension method offers unique benefits and suits different lifestyles and skills. |
| Pro-level aftercare | Daily gentle care keeps extensions natural and long-lasting. |
What you need for a seamless natural hair extension look
Let’s lay out exactly what you need to achieve an effortless and natural result. Having the right tools and products before you start makes a significant difference to the final outcome. Rushing in without preparation is one of the most common reasons extensions look obvious rather than blended.
Essential tools and products
Before you begin, gather the following:
- A wide-tooth comb and a soft-bristle extension brush
- Sectioning clips (at least six)
- Your chosen hair extensions (clip-in, halo, or tape-in)
- A sulphate-free shampoo and conditioner
- A quality heat protectant spray
- A flat iron or curling wand set to a low heat
- Natural daylight or a daylight lamp for colour checking
Choosing the right extensions
The type of extension you choose matters as much as the quality. Clip-ins are the most beginner-friendly, offering flexibility and zero commitment. Halos sit on an invisible wire and require no clips or glue at all. Tape-ins are semi-permanent and applied by a professional, offering a longer-lasting result. Each method suits different lifestyles and hair types, so consider how often you want to wear them and how much time you are willing to invest.
When it comes to shade, matching extension colour is where many people go wrong. The key is to match the depth of colour at the mid-shaft of your hair, not the roots or the ends. Roots are often darker and ends are typically lighter due to natural fading, so the mid-shaft gives you the most accurate base tone. As noted in our natural-looking hair extensions guide, expert extensions guidance recommends using sulphate-free products and a heat protectant, and always checking your colour match in natural light rather than artificial indoor lighting.
Pro Tip: Hold your extension weft next to your mid-shaft in a doorway or near a window. Natural light reveals undertones that artificial lighting masks, and getting this right saves you from an obvious mismatch.
Pre-application hair prep checklist
| Step | What to do | Why it matters |
|---|---|---|
| Wash | Use sulphate-free shampoo | Removes build-up without stripping moisture |
| Condition | Apply from mid-length to ends | Keeps hair smooth and manageable |
| Dry | Blow-dry or air-dry fully | Extensions grip better on dry hair |
| Detangle | Use wide-tooth comb gently | Prevents breakage during sectioning |
| Protect | Apply heat protectant | Shields both natural hair and extensions |
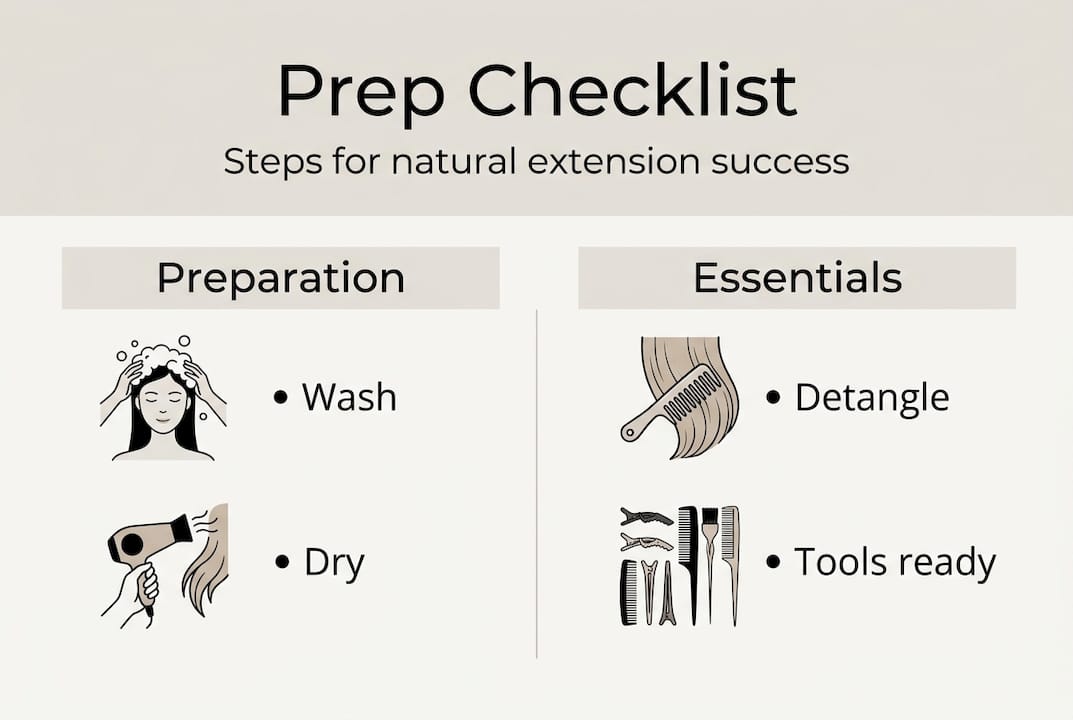
Starting with clean, dry, and fully detangled hair gives your extensions the best possible foundation. Skipping any of these steps can result in slippage, poor blending, or unnecessary stress on your natural hair.
Step by step: Applying your hair extensions for a natural finish
With everything ready, let’s walk through each step for flawless application. Following a clear sequence makes the process faster and ensures a more polished result every time.
-
Wash and dry your hair thoroughly. Begin with clean, completely dry hair. Extensions grip far better on dry hair, and any moisture left behind can cause clips to slip throughout the day.
-
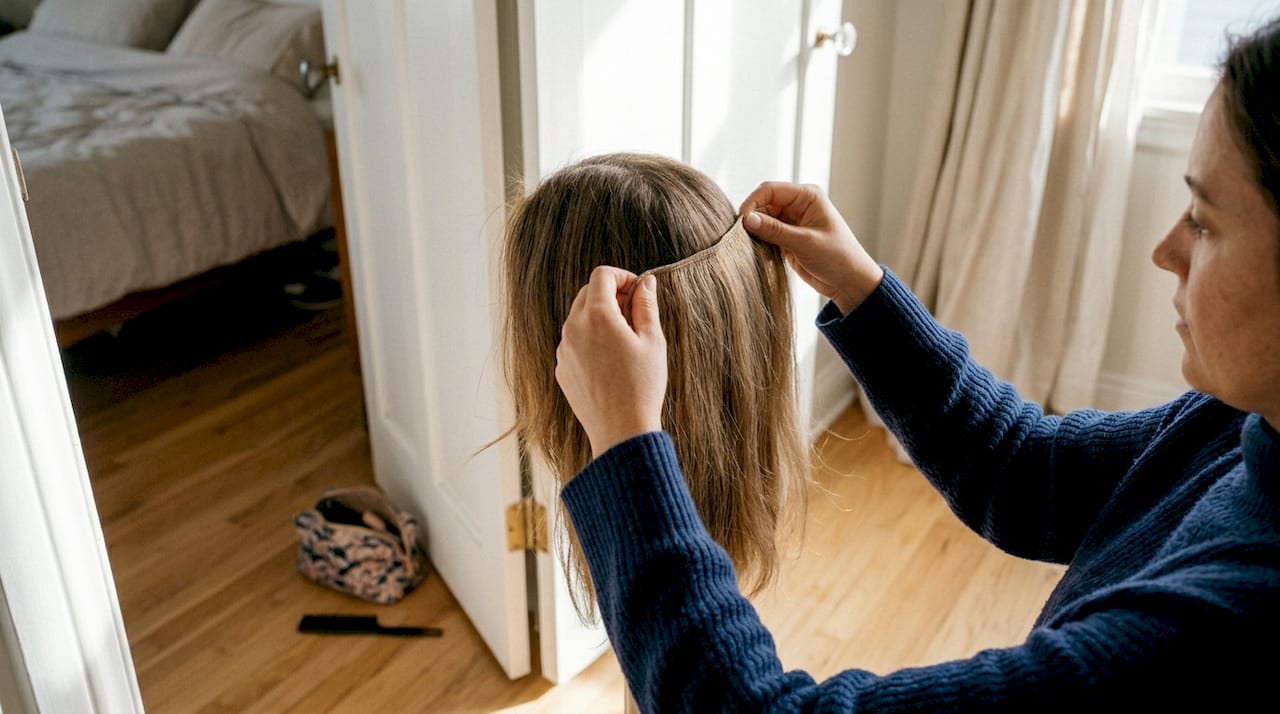
Section from the nape upwards. Use a tail comb to create a clean horizontal parting just above the nape of your neck. Clip the rest of your hair up and out of the way. This bottom-up approach is essential for creating layers that look natural.
-
Open your clips and position carefully. For clip-in extensions, open each clip and position the weft close to the root of your sectioned hair. Avoid placing clips directly on the hairline, as this can create tension. As outlined in our detailed clip-in hair extension steps, clip-in application technique involves positioning close to the roots without pulling tight, then snapping the clips shut firmly.
-
Snap the clips shut and check the fit. Once clipped, gently tug the weft to confirm it is secure. It should feel firm but not uncomfortable. If there is any pulling sensation on your scalp, reposition the weft slightly lower.
-
Release the next section and repeat. Work your way up the head, releasing one section at a time and applying wefts in layers. Stagger the wefts slightly so they do not all sit at the same height, which creates a more natural volume distribution.
-
Blend with a brush or low-heat styling tool. Once all wefts are in place, use a soft-bristle brush to blend your natural hair with the extensions. A light pass with a flat iron on a low heat setting helps the textures merge seamlessly.
Important: Never pull the clips too tightly against your scalp. Consistent tension at the root can lead to traction stress on your follicles over time. Comfort is always a good indicator that the placement is correct.
If you are still deciding which method suits your hair type and lifestyle, our guide to choosing hair extensions covers everything you need to make an informed decision.
Different extension methods: Time, results, and suitability
Now you know how to apply extensions, it is useful to understand the differences between popular methods. Not every technique suits every person, and knowing what each one offers helps you invest wisely.
Quick comparison of the three main methods
| Method | Application time | Longevity | Skill level | Best for |
|---|---|---|---|---|
| Clip-in | 5 to 15 minutes | 1 to 2 years | Beginner | Versatile, including updos |
| Halo | Under 1 minute | 6 to 12 months | Beginner | Everyday wear, down styles |
| Tape-in | 1.5 to 2 hours | 6 to 8 weeks | Professional | Semi-permanent, seamless finish |
According to a complete UK buying guide, extension method guide data confirms clip-ins last 1 to 2 years with proper care, halos last 6 to 12 months, and tape-ins require professional reapplication every 6 to 8 weeks.
Which method suits you?
- Clip-ins are ideal if you want flexibility. You can wear them for a special occasion and remove them the same evening. They also work well for updos and half-up styles.
- Halo extensions are perfect for everyday wear. They sit on an invisible wire that rests on the crown and take seconds to place. They work best with hair worn down.
- Tape-ins suit those who want a longer-term solution. Because they lie flat against the scalp, they blend exceptionally well and are virtually undetectable. However, they do require a professional for both application and removal.
For those using a halo or invisible wire style, our invisible wire blending tips offer practical advice on achieving a truly seamless result. If you are still weighing up your options, our extension method selection guide can help narrow things down based on your hair type and daily routine.
Blending and caring for your extensions: Pro tips for a lasting, flawless look
To keep your new look flawless, blending and aftercare are key. Even the highest quality extensions will look dull and obvious without the right maintenance routine.
Daily care essentials
- Brush gently from the ends upwards, working your way to the roots to avoid tugging
- Use a sulphate-free shampoo to preserve both the extensions and your natural hair
- Apply conditioner from mid-length to ends only, avoiding the bonds or wefts
- Limit heat styling where possible, and always use a heat protectant when you do
- Store clip-ins and halos flat or rolled loosely to prevent tangling
As highlighted in our extension care tips, consistent gentle care is the single biggest factor in how long your extensions last. Our maintenance checklist gives you a week-by-week routine to follow.
Blending in different lighting conditions
One thing many guides overlook is how extensions can look different under various lighting conditions. A shade that looks perfect indoors may appear slightly off in bright sunlight. This is why colour matching matters so much at the selection stage, and why checking your match in natural light, as recommended in our blending guidance, is non-negotiable.
Pro Tip: Always detangle your extensions gently before washing them. Wet hair is more fragile, and working through knots once the hair is saturated causes far more damage than a quick brush-through beforehand.
Quick-care dos and don’ts
- Do sleep with your hair in a loose braid to reduce friction and tangling
- Do use a silk or satin pillowcase to minimise frizz and breakage
- Don’t go to bed with wet extensions, as this encourages matting
- Don’t apply conditioner or oils directly to the bonds or clips
- Don’t use clarifying shampoos, which strip moisture and shorten extension life
The truth about effortless, natural hair extension transformations
With all the practical steps covered, let us discuss what experience in the salon has truly taught us. There is a persistent idea that achieving a natural look with extensions is simply a matter of clipping in and walking out. In reality, the results that look truly effortless are the ones that had the most thought put into them beforehand.
Many so-called quick fixes backfire because of poor quality hair, rushed colour matching, or wefts placed without care. Visible wefts and obvious blending lines are almost always the result of cutting corners, not the method itself. Real Remy human hair behaves like your own because it is ethically sourced with the cuticles aligned in the same direction, which means it moves, reflects light, and responds to styling in a way that synthetic hair simply cannot replicate.
What experienced stylists always do, even when pressed for time, is take those extra few minutes to check the colour in natural light, section cleanly, and blend thoroughly. Our expert hair extension care advice reflects this same principle. Speed matters, but not at the expense of the finish.
Upgrade your look with premium, damage-free extensions
Ready to put these steps into action? At Naturyl Extensions, we offer a carefully curated range of Remy human hair extensions designed for effortless, damage-free wear. Every product is crafted with comfort, blendability, and longevity in mind, so you can achieve a salon-quality result from the comfort of your own home.
Whether you are after a subtle boost or a dramatic transformation, our 16 inch extensions offer gorgeous, natural-looking length, while our 12 inch extensions are perfect for adding volume and a touch of extra length. We offer fast UK delivery and a free exchange policy, so finding your perfect match has never been easier or more risk-free.
Frequently asked questions
How do I make sure my extensions match my natural hair colour?
Match the depth of colour at the mid-shaft of your hair, not the roots, and always check in natural light for the most accurate result. Our colour matching guide explains exactly how to identify your true base tone.
Which type of extension is quickest to apply at home?
Halo extensions are the fastest option, taking under a minute to apply and requiring no clips, glue, or special tools whatsoever.
How do I stop extensions from damaging my own hair?
Choose gentle methods such as clip-ins or halos, and always position wefts close to the root without pulling tightly. Using a heat protectant every time you style also keeps both your natural hair and extensions in good condition.
How long do quality hair extensions typically last?
With proper care, clip-ins last 1 to 2 years and halos around 6 to 12 months. Tape-ins require professional reapplication every 6 to 8 weeks but offer a very natural finish during that time.


