


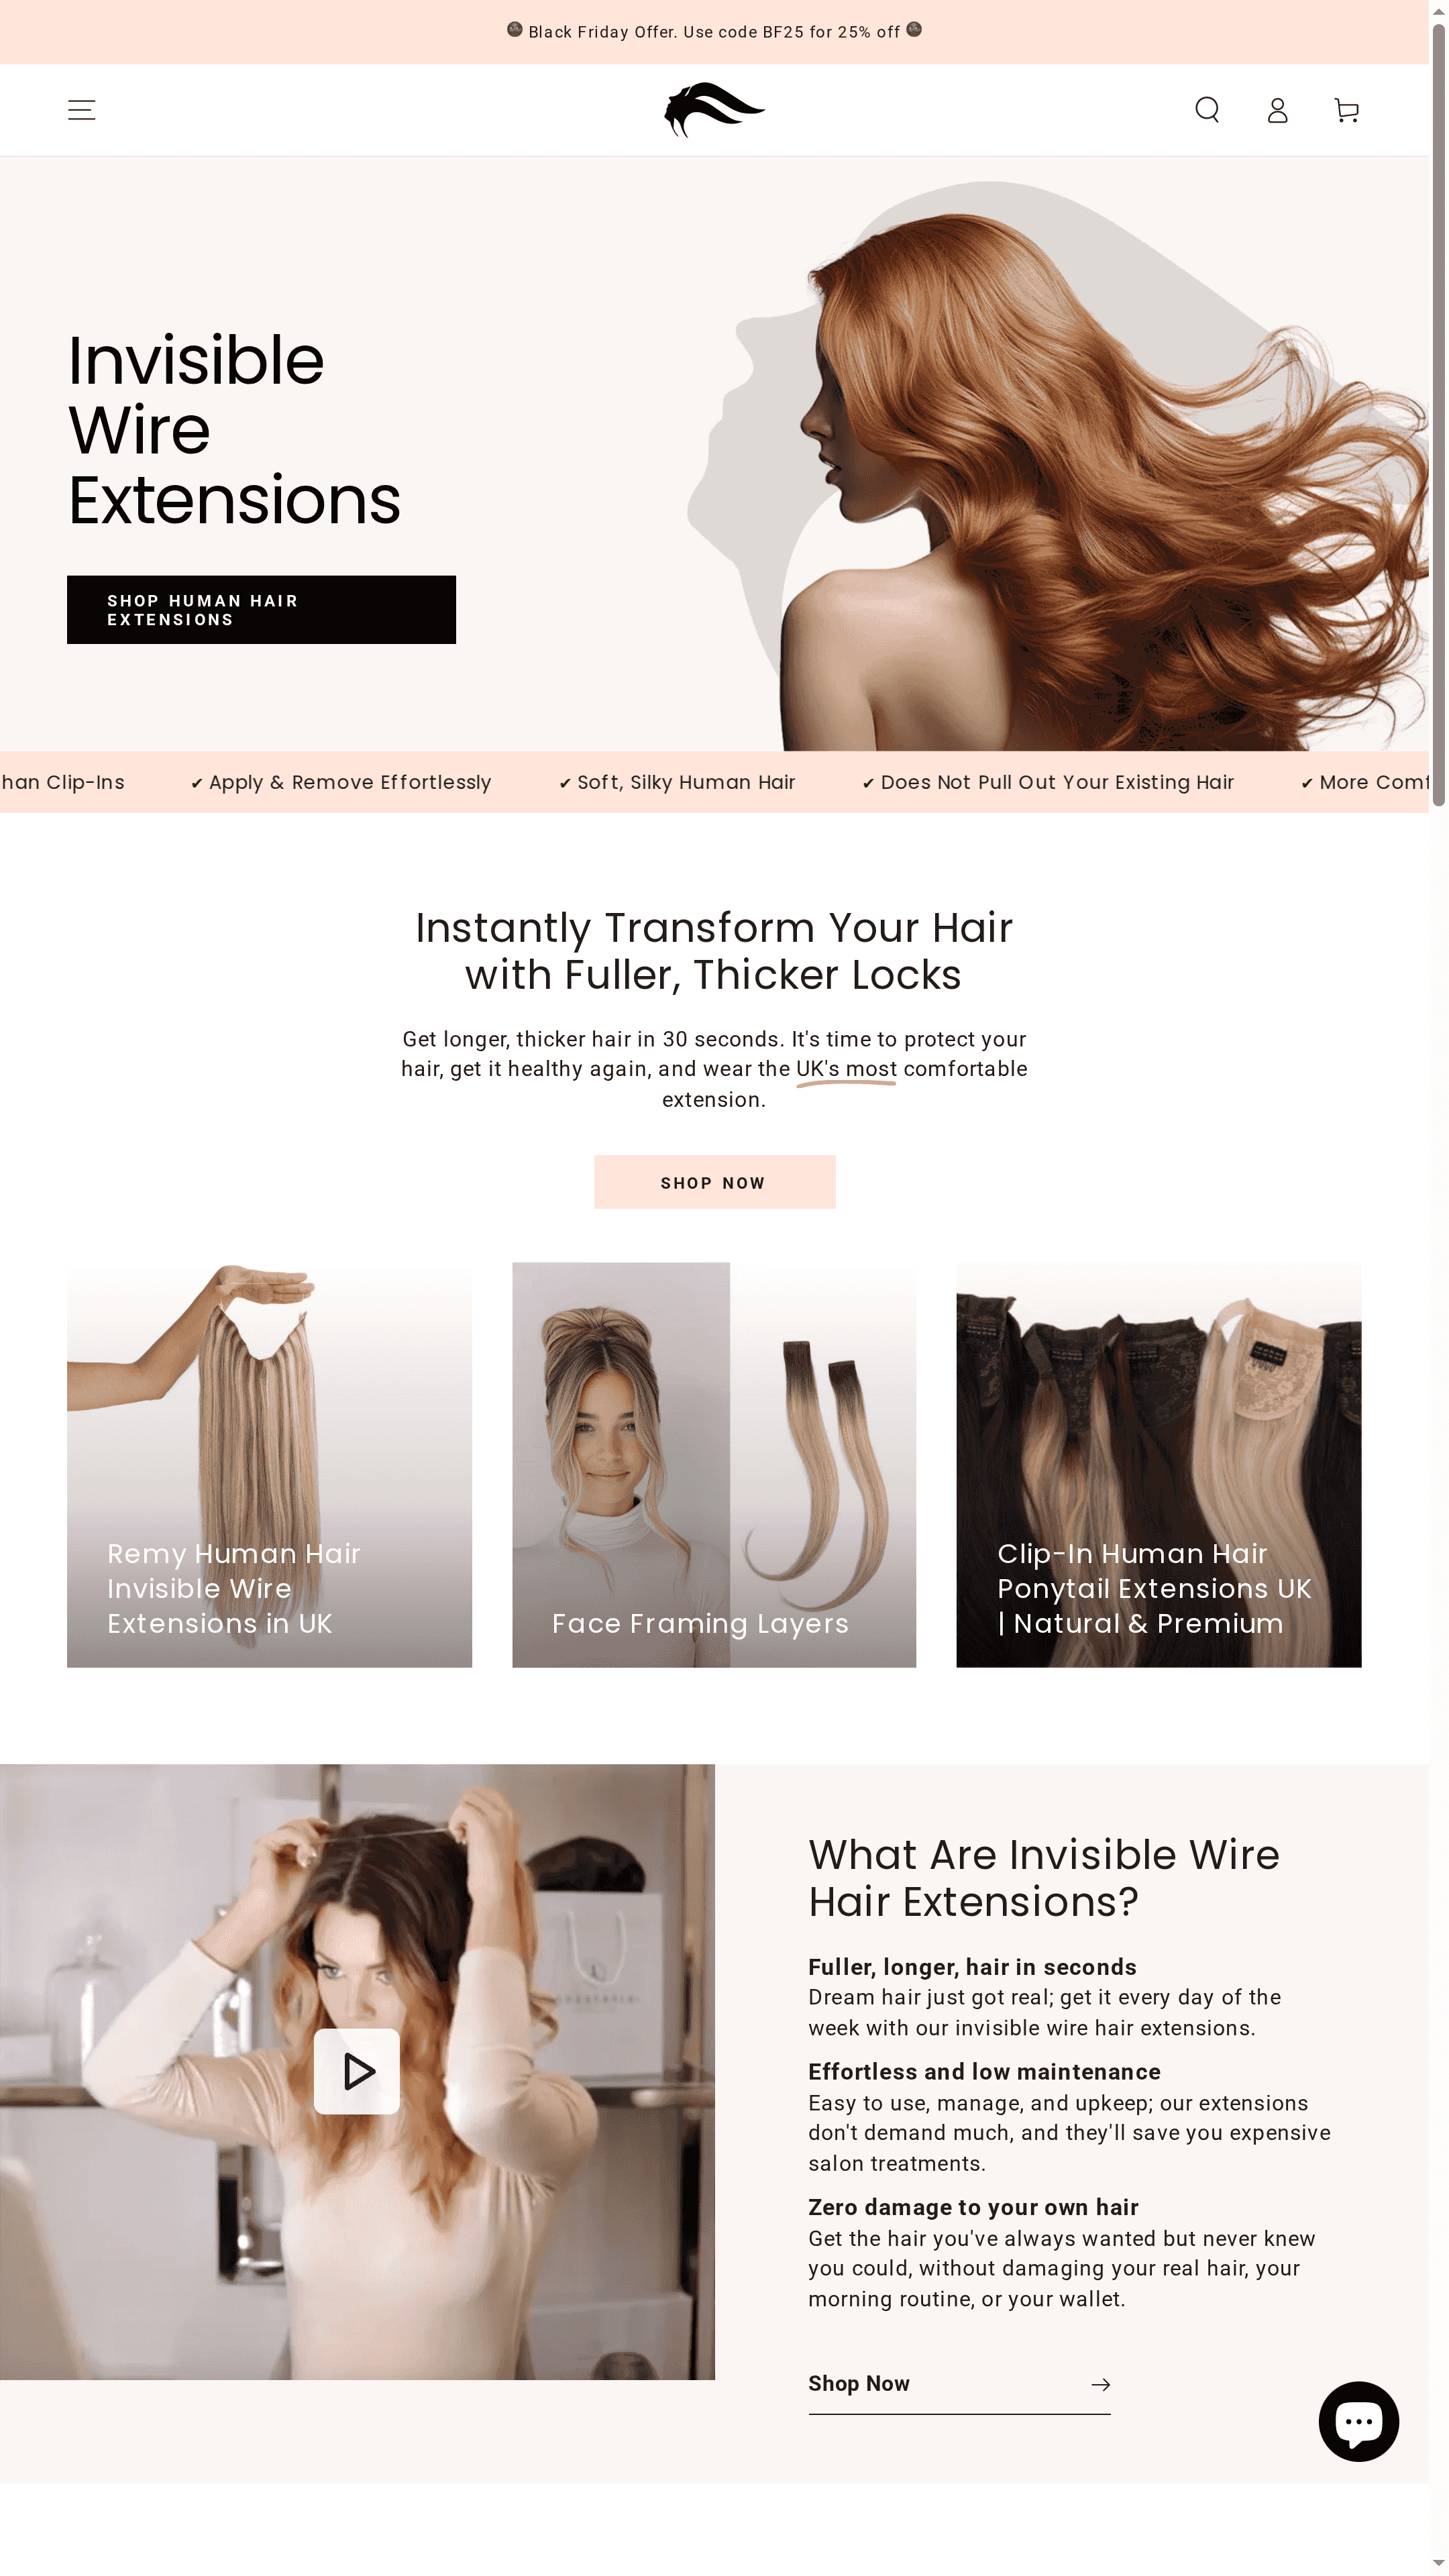
Struggling to achieve fuller hair without the hassle or risk of damage is a familiar challenge for many British women. Wanting your hair to look naturally voluminous yet feel light and comfortable all day is far from impossible. By embracing invisible wire extensions crafted from nearly undetectable nylon or polyester fibres, you can seamlessly blend extra length and fullness into your own style, ensuring your natural hair and scalp remain happy and healthy.
Table of Contents
- Step 1: Prepare Your Natural Hair For Extension Fitting
- Step 2: Select And Adjust Your Invisible Wire Extension
- Step 3: Apply The Invisible Wire Extension For Secure Placement
- Step 4: Blend The Extension Seamlessly With Your Natural Hair
- Step 5: Check Fit And Comfort For Flawless Results
Quick Summary
| Key Insight | Explanation |
|---|---|
| 1. Thoroughly prepare your hair. | Wash and condition hair before fitting to ensure it’s clean and manageable, aiding extension attachment. |
| 2. Check scalp condition before fitting. | Assess for irritation or sensitivity to ensure the fitting process is comfortable and effective. |
| 3. Adjust extension tension properly. | Ensure the invisible wire is snug yet comfortable to prevent discomfort or slippage during daily wear. |
| 4. Blend extensions with natural hair. | Use techniques such as curling or layering to create a seamless transition between your hair and the extension. |
| 5. Conduct a final comfort check. | Test the fit and security by moving your head, ensuring the extension remains stable and feels natural. |
Step 1: Prepare your natural hair for extension fitting
This step is all about setting up your natural hair for success. You’re essentially creating the ideal foundation that will keep your extensions secure, comfortable, and looking completely natural. Proper preparation prevents scalp irritation, ensures even weight distribution, and helps your invisible wire extensions blend seamlessly with your own hair. Think of it as priming a canvas before painting—the better your base, the better the final result.
Start by giving your hair a thorough wash two to three days before your fitting appointment. This timing is important because your scalp needs to produce just enough natural oils to protect it during the fitting process, without being visibly greasy. Use a clarifying shampoo to remove any product buildup, residue from styling products, or mineral deposits that might interfere with the extension attachment. Once you’ve washed your hair, condition it generously, focusing on the mid-lengths and ends rather than the roots. Your hair should feel soft and manageable, not stiff or weighed down.
Next, gently detangle your hair using a wide-toothed comb or a paddle brush, working from the ends upward to avoid breakage. This step is crucial because matted or tangled hair can lead to uneven placement and potential stress on your strands when the extensions are attached. Before your appointment, section your hair into four to six neat sections using clips, which makes the fitting process far quicker and more precise. Part your hair horizontally from ear to ear across the crown, then divide the back section vertically down the middle. Proper sectioning also allows your stylist to assess your hair quality and density to ensure extensions are placed optimally for your specific hair type.
Check your scalp for any irritation, sensitivity, or active breakouts. If you have a sensitive scalp or any existing conditions, mention this to your stylist before the fitting begins. They may recommend a lighter placement or suggest adjustments to the process. Avoid harsh treatments like perming, relaxing, or colouring your hair for at least two weeks before your appointment, as these can compromise hair strength. If you’ve recently had your hair coloured, wait until any processing is completely finished and your hair has settled before fitting extensions.
Consider applying a protective scalp oil or serum the night before your appointment. This creates a barrier between the extension attachment point and your scalp, reducing discomfort during the fitting. Products like coconut oil or specialist scalp treatments work beautifully for this purpose. Just keep in mind that overly oily hair can actually make extensions slip, so don’t go overboard—a light application is all you need.
Make sure you’re well rested and hydrated on the day of your fitting. This might sound odd, but when you’re relaxed and hydrated, your scalp is less sensitive, and the entire process becomes more comfortable. Arrive with clean, dry, detangled hair that’s been sectioned as described. Your stylist will likely go through additional assessment steps to ensure everything is perfect before beginning the actual fitting.
When you’re exploring guidance on caring for your natural hair while wearing extensions, you’ll see how this preparation directly impacts your ongoing results. The healthier and better prepared your hair is at the start, the easier maintenance becomes later on.
Professional tip Invest in a silk or satin pillowcase the week before your fitting—it reduces friction on your hair and scalp, meaning you’ll arrive at your appointment with smoother, less tangled hair and a calmer scalp that’s less reactive to the fitting process.
Step 2: Select and adjust your invisible wire extension
This step determines how well your extension will sit, feel, and blend with your natural hair. You’re essentially finding the perfect fit and tension that keeps your extension secure without causing discomfort or putting stress on your hair. The right selection and adjustment mean the difference between an extension that feels weightless and invisible versus one that tugs at your scalp or slips throughout the day. Getting this part right sets you up for weeks of comfortable, confident wear.
Start by examining the invisible wire itself. The wire material matters tremendously because it needs to be thin enough to remain undetectable against your scalp whilst still being sturdy enough to hold your hair securely. Thin, nearly undetectable wire materials made from nylon or polyester fibres are the most effective options, as they blend seamlessly without creating visible bumps or ridges beneath your hair. When you receive your extension, run your fingers along the wire to assess its flexibility. A good quality invisible wire should bend smoothly without being flimsy, and it should spring back to its original shape when released. If the wire feels stiff or brittle, it may cause discomfort during wear or snap under pressure.
Here is a comparison of invisible wire material types commonly used in hair extensions:
| Wire Material | Visibility Against Scalp | Comfort Level | Durability |
|---|---|---|---|
| Nylon | Nearly invisible | Soft, flexible | Resilient |
| Polyester fibre | Very discreet | Smooth, adapts well | Long-lasting |
| Standard plastic | More visible | Prone to rigidity | May snap |
| Metal (rare) | Clearly visible | Can cause pressure | Unsuited |
Next, hold the extension against your head to determine the correct placement. Position it horizontally across the back of your head, roughly where you sectioned your hair during preparation. The wire should sit comfortably against your scalp without pressing hard or feeling loose. Some people prefer the extension to sit slightly lower at the nape of the neck, whilst others like it higher for more volume at the crown. There’s no single correct position—it’s entirely about your preference and what makes sense for your hair texture and style goals. If you’re using high-quality materials that mimic your natural hair texture and colour, the extension will blend seamlessly regardless of where you position it, as long as it’s secure.

Adjusting the tension is where your comfort truly comes into play. The wire needs to be snug enough that it won’t slip out when you move, but not so tight that it creates constant pressure on your scalp. Start by fastening the extension gently, then slowly increase the tightness whilst paying attention to how your scalp feels. You should be able to fit one finger comfortably between the wire and your head—this is the sweet spot for most people. If you can fit more than one finger, the tension is too loose and the extension will shift. If you cannot fit even one finger, loosen it slightly until you reach that comfortable balance. Your scalp will adapt over a few hours, so what feels slightly snug initially often becomes perfectly comfortable by midday.
If your extension came with adjustment fasteners or closures, familiarise yourself with how they work before securing them permanently. Most invisible wire extensions feature adjustable hooks or clips that allow you to modify the tension after fitting. Take time to test these mechanisms so you know exactly how to tighten or loosen the extension if needed throughout the day. Some extensions also come with sizing options, so if yours feels slightly too large or small, check whether it can be trimmed or adjusted by a professional stylist.
Step back and look at your reflection from multiple angles. The extension should sit flush against your scalp with no visible gaps, and your natural hair should flow seamlessly over and around the wire. If you see any bumps, bulges, or sections where the extension looks detached, adjust the positioning or tension accordingly. The goal is for the extension to be completely invisible to anyone looking at you, with the added volume and length appearing entirely natural.
Professional tip After adjusting your extension, wear it for just 30 minutes around your home before committing to a full day out—this allows your scalp to adjust and helps you identify any pressure points that might need fine tuning before you head out into the world.
Step 3: Apply the invisible wire extension for secure placement
This is where your invisible wire extension transitions from being an accessory to becoming part of your hair. You’re creating a secure, comfortable connection that will last throughout your day and beyond. Proper application ensures the extension stays firmly in place without slipping, tugging, or creating uncomfortable pressure points on your scalp. Taking time to apply it correctly now means you won’t spend the day adjusting or worrying about your extension coming loose.
Begin by positioning your hair exactly as you sectioned it during preparation. Take the invisible wire extension and hold it horizontally against the back of your head, just above where your natural hair naturally sits. The wire should rest against your scalp without any gaps between it and your head. Now comes the crucial part: you’ll gently thread your natural hair through or around the wire, working section by section. Start from one side and work your way across, making sure each section of hair is properly integrated with the wire. This threading process is what creates the secure bond between your extension and your natural hair. Proper threading of the wire through natural hair strands ensures the extension stays firmly attached without excessive tension that might cause breakage. Work slowly and deliberately, checking that no hair is pinched or twisted around the wire, as this could lead to discomfort later.
As you thread your hair, maintain consistent, moderate tension. The wire needs to be snug enough to hold your hair securely, but you should never feel like you’re pulling or straining your natural strands. If you notice any areas where the wire feels loose or where hair isn’t making full contact with the wire, pause and adjust before moving forward. Once you’ve threaded all your hair, gently tighten the fastening mechanism on your extension. This is typically a hook, clip, or sliding closure that secures the wire around your head. Tighten it gradually whilst checking how your scalp feels. You’re aiming for that one-finger-gap rule again: snug enough to be secure, but loose enough to remain comfortable. Securing the wire with locking mechanisms ensures durability and prevents slipping throughout the day, which is essential for both comfort and the longevity of your extension.
After securing the fastening mechanism, run your fingers along the inside of the wire where it meets your scalp. You’re checking for any rough edges, twists, or uncomfortable pressure points. If you find any problem areas, loosen the extension slightly and adjust the position or the way your hair is threaded until everything feels smooth and comfortable. Pay special attention to the sides near your ears and the nape of your neck, as these areas tend to be more sensitive. Take a final look in the mirror from multiple angles. Your hair should flow naturally over and around the extension with no visible gaps or bumps. The extension itself should be completely invisible, with only the added fullness and length visible as the result. If you notice any sections where the extension looks detached or where there are visible ridges, make adjustments before you commit to wearing it for the day.
Test the security of your extension by gently moving your head side to side and nodding. The extension should stay firmly in place without shifting. If you feel any movement or slipping, tighten the fastening mechanism a bit more. Once you’re confident in the placement and security, you’re ready to style your hair. Whether you’re planning to wear it down, up in a ponytail, or in any other style, your invisible wire extension should provide the foundation for effortless, fuller looking hair that moves naturally with you.
Professional tip After applying your extension, spend the first hour doing light activities at home such as reading or watching television, which allows you to notice any discomfort or adjustment needs before heading out into your day, ensuring you catch any issues whilst you can still make quick tweaks.
Step 4: Blend the extension seamlessly with your natural hair
This is where your invisible wire extension truly becomes invisible. Blending is the art of making your extension disappear into your natural hair so completely that no one would ever know it’s there. You’re not just attaching hair to your head—you’re creating a cohesive, unified look where your extension enhances your natural hair rather than sitting on top of it. Proper blending determines whether your fuller hair looks like a natural transformation or an obvious extension.

Start by combing your entire head gently with a paddle brush or wide-toothed comb. Begin at the roots and work downwards, smoothing your natural hair over and around the extension wire. As you do this, you’re achieving two things simultaneously: hiding the attachment points where the wire meets your scalp, and creating a smooth transition between your natural hair and the extension hair. Pay particular attention to the areas directly over the wire, ensuring your natural hair sits flat and seamless over the attachment. Run your fingers along the top of your head where the wire sits. You should feel only smooth hair with no bumps or ridges visible. If you notice any areas where your natural hair isn’t lying flat, use a bit of hairspray to smooth it down gently.
Next, assess the overall colour and texture match between your natural hair and the extension. Blending extensions by matching colour, texture, and density ensures the extension integrates naturally without standing out visually. If you ordered your invisible wire extension in the correct shade, this step becomes much simpler. Look at your hair in natural daylight from multiple angles. The extension hair should blend so well that it appears to be an extension of your own hair, not an addition to it. If there’s any visible demarcation line or colour difference between where your natural hair ends and the extension begins, you may need to have the extension trimmed slightly shorter or adjusted by a professional stylist to create a more gradual transition.
For texture blending, consider whether your natural hair is straight, wavy, or curly. Using layering and styling techniques to disguise extension lines creates a more cohesive appearance. If your natural hair has texture or waves and your extension is straight, gently curl or wave the extension hair to match. Conversely, if your extension has some wave and your hair is completely straight, you might straighten the extension slightly. The goal is visual harmony. Use a low-heat styling tool if needed, being gentle to avoid damaging the extension hair. Many people find that creating subtle waves throughout both their natural hair and the extension creates a soft, blended look that disguises any potential join lines.
Think about layering your hair to enhance the blend. Longer layers throughout your hair create movement and help disguise the extension, making it impossible to tell where your natural hair ends and the extension begins. If you want to incorporate more dramatic layering, consider consulting a stylist experienced with extensions. They can trim your hair in a way that works specifically with your invisible wire extension, creating a style that looks intentional and flattering rather than obviously extended.
Check the density and volume distribution. Your extension should add fullness that looks like it’s coming from your own scalp, not sitting separately beneath your natural hair. If the extension feels too bulky or creates an obvious thickness in one spot, you may need to adjust how the extension is positioned or how much of your natural hair you’re threading through it. The blend should feel balanced, with volume distributed evenly throughout your hair rather than concentrated in one area.
Here is a summary of common blending issues with invisible wire extensions and how to address them:
| Blending Issue | Visible Sign | Professional Fix |
|---|---|---|
| Colour mismatch | Obvious transition lines | Tint or tone extension hair |
| Texture difference | Extension appears separate | Match extension texture by styling |
| Density imbalance | Bulky or flat patches | Re-adjust or layer both hair types |
| Wire visibility | Wire peeks or bumps seen | Better positioning, increase coverage |
Finally, style your hair as you normally would. Wear it down, up, to the side, or however makes you feel confident. The beauty of a well-blended invisible wire extension is that it works with virtually any style. Once you’ve achieved proper blending, your extension will move naturally with your hair, stay comfortable throughout the day, and give you the fuller, longer hair you’ve been wanting without anyone knowing the secret behind it.
Professional tip Apply a lightweight hair serum or oil to the mid-lengths and ends of both your natural hair and the extension, which creates a cohesive shine and smoothness that makes the blend appear completely natural whilst also protecting the extension hair from drying out.
Step 5: Check fit and comfort for flawless results
This final check determines whether your invisible wire extension will deliver the effortless, comfortable wear you’re expecting. You’re essentially conducting a thorough assessment to ensure the extension sits perfectly, feels secure, and causes no discomfort that might develop into problems over the coming days. Taking time now to verify everything is correct means you can wear your extension with complete confidence, forgetting it’s even there and simply enjoying your fuller hair.
Begin by standing in front of a mirror and looking at your reflection from straight on. Tilt your head gently from side to side, noting whether the extension moves with your head or shifts independently. The extension should feel like part of your head, moving naturally as one cohesive unit. If you notice any slipping, sliding, or movement that feels separate from your scalp, the fit needs adjustment. Loosen the fastening slightly, reposition the extension, and tighten again until it feels secure. Next, nod your head forwards and backwards slowly. Again, the extension should remain firmly in place without tugging or pulling at your scalp. Move your head in larger circles, gradually increasing the range of motion. Your extension should remain stable throughout these movements without causing any discomfort.
Now comes the comfort check, which is absolutely crucial for all-day wearability. Ensuring extensions feel natural without tightness or heaviness prevents hair breakage and scalp irritation over time. Run your fingers gently along the inside edge of the wire where it meets your scalp. You’re checking for pressure points, rough edges, or areas where the wire digs in uncomfortably. Pay special attention to the sides near your ears and the nape of your neck, where sensitivity is typically highest. If you find any uncomfortable spots, you have a few options. First, try adjusting the position of the extension slightly. Sometimes shifting it just a centimetre or two makes all the difference. If repositioning doesn’t help, loosen the fastening mechanism slightly to reduce tension. Remember, the goal is snug enough to be secure, but comfortable enough that you forget you’re wearing it.
Check for any pulling or tugging sensations on your scalp. Proper fit means the wire sits flat and securely without causing pressure points that could lead to discomfort during extended wear. If you feel any pulling, it typically means the extension is positioned too high or too tight. Lower the extension slightly at the back or reduce the tension at the fastening points. Conversely, if the extension feels loose or wobbly, tighten it gradually whilst monitoring how your scalp responds. The sweet spot is when you can fit one finger comfortably between the wire and your head, as you’ve already learned.
Look carefully at the hairline and the back of your neck. The extension should be completely invisible in these areas, with your natural hair smoothly covering the wire and any attachment points. If you see the wire peeking through anywhere, your natural hair isn’t covering it properly. Adjust how you’ve positioned your hair over the wire, or use a light hairspray to help secure stray strands in place. The back of your neck is particularly important because this area catches people’s eyes when you’re moving or looking downwards.
Take a moment to assess the overall weight distribution. Your extension should feel balanced and evenly distributed across your head, not heavier on one side or concentrated in one spot. If you notice weight imbalance, check that the extension is sitting level and that your hair is threaded evenly through the wire on both sides. Uneven threading can create a lopsided feel that becomes increasingly uncomfortable throughout the day.
Finally, rate your comfort level on a scale of one to ten. You should be aiming for at least an eight. If you’re below that, take time now to make adjustments rather than attempting to tolerate discomfort throughout your day. The extension should feel so comfortable that by midday, you’ll have largely forgotten you’re wearing it. If after all adjustments you’re still experiencing discomfort, contact the Naturyl Extensions team or visit a professional stylist for assistance. Sometimes a small professional adjustment makes a tremendous difference.
Professional tip Wear your extension for just two hours on day one, gradually increasing the wear time each day as your scalp adjusts, which allows you to catch any comfort issues early whilst still having time to make adjustments before committing to a full day of wear.
Achieve Effortless Fuller Hair with Naturyl Invisible Wire Extensions
Struggling to find extensions that offer a natural look without damaging your hair or causing discomfort is a common challenge. This tutorial highlights how difficult it can be to get the perfect blend, secure fit, and comfortable wear with invisible wire extensions. At Naturyl Extensions, we understand these concerns and provide premium, ethically sourced human hair extensions designed specifically for easy use and long-lasting comfort. Whether you want to add volume or length, our Extensions collection includes invisible wire options that prioritise seamless integration and scalp-friendly tension.
Experience the difference with our range of 18 Inch Hair Extensions and 16 Inch Human Hair Extensions crafted to match your natural hair texture and colour perfectly. With fast UK delivery and a free exchange policy, there has never been a better time to transform your hair effortlessly. Visit Naturyl Extensions today and start your journey to fuller, healthier-looking hair that feels comfortable and looks completely natural.
Frequently Asked Questions
How do I prepare my natural hair before fitting invisible wire extensions?
To prepare your natural hair, wash it two to three days before your fitting to allow natural oils to develop without excess greasiness. Use a clarifying shampoo to remove product buildup and condition your hair thoroughly, focusing on the mid-lengths and ends to ensure it feels soft and manageable.
What should I consider when selecting and adjusting my invisible wire extension?
When selecting and adjusting your invisible wire extension, examine the wire material for comfort and durability. Ensure the wire is snug but comfortable against your scalp, fitting one finger comfortably between the wire and your head for optimal tension.
How do I apply the invisible wire extension for secure placement?
To apply the invisible wire extension, position it horizontally at the back of your head and gently thread your natural hair through the wire, ensuring each section is integrated smoothly. Secure the fastening mechanism while ensuring it remains snug enough to prevent slipping without causing discomfort.
What techniques can I use to blend my extension seamlessly with natural hair?
To blend your extension seamlessly, start by gently combing your natural hair over the extension wire and assessing the colour and texture match. You can use styling techniques, such as curling or layering, to create a unified look that disguises any visible joins.
How can I check the fit and comfort of my invisible wire extension?
To check the fit and comfort, look in the mirror while gently moving your head side to side and nodding. Ensure the extension feels secure and doesn’t shift or tug at your scalp; adjust tension as needed until you achieve a comfortable fit that remains stable during movement.


